Jenkins Configuration as Code - first encounter!
I have waited from the moment I’ve seen this plugin in the early development, and it is finally here!
Ladies and gentlemen, it’s time to play with JCasC, version 1.0 - the Jenkins Configuration as Code plugin.
Key takeaways:
- what is JCasC plugin?
- how to configure Jenkins instance with a single configuration file
- how to pre-install plugins
- how to pre-configure jobs with JobDSL plugin & JCasC
Disclaimer: it’s a ‘first encounter’ post - I simply figure stuff out on the go, it’s a simple PoC, don’t expect production-ready stuff at the end :).
Background
Anyone that has ever set up a single Jenkins instance (e.g. when trying out Pipelines following one of the previous posts), have gone through its setup process. You probably are familiar with seeing following screens:
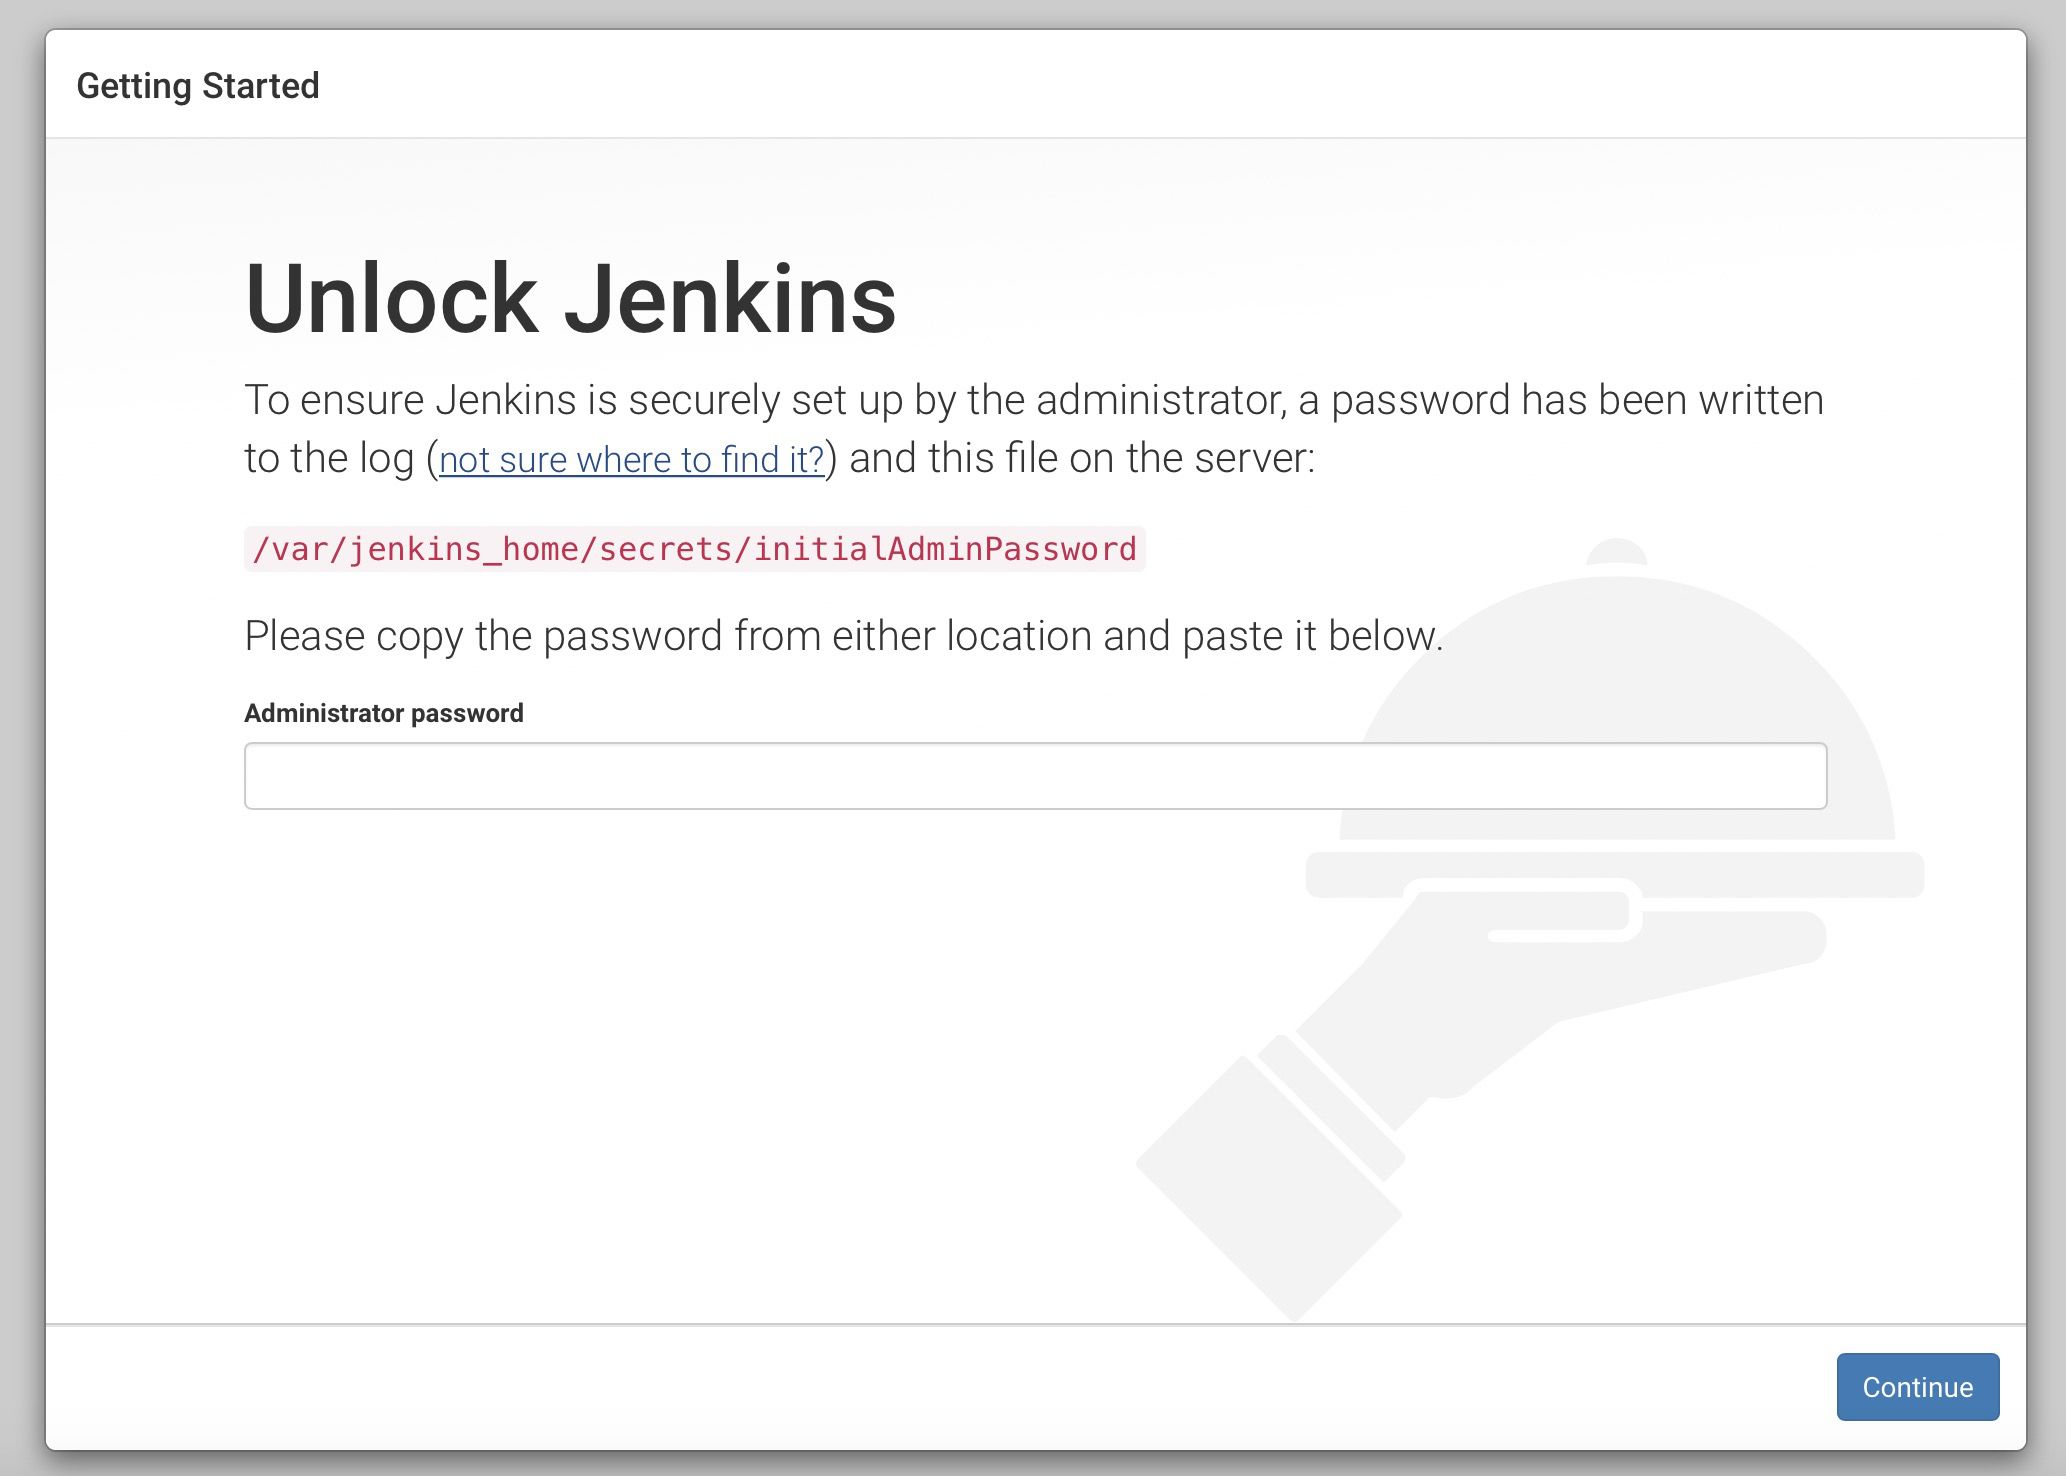
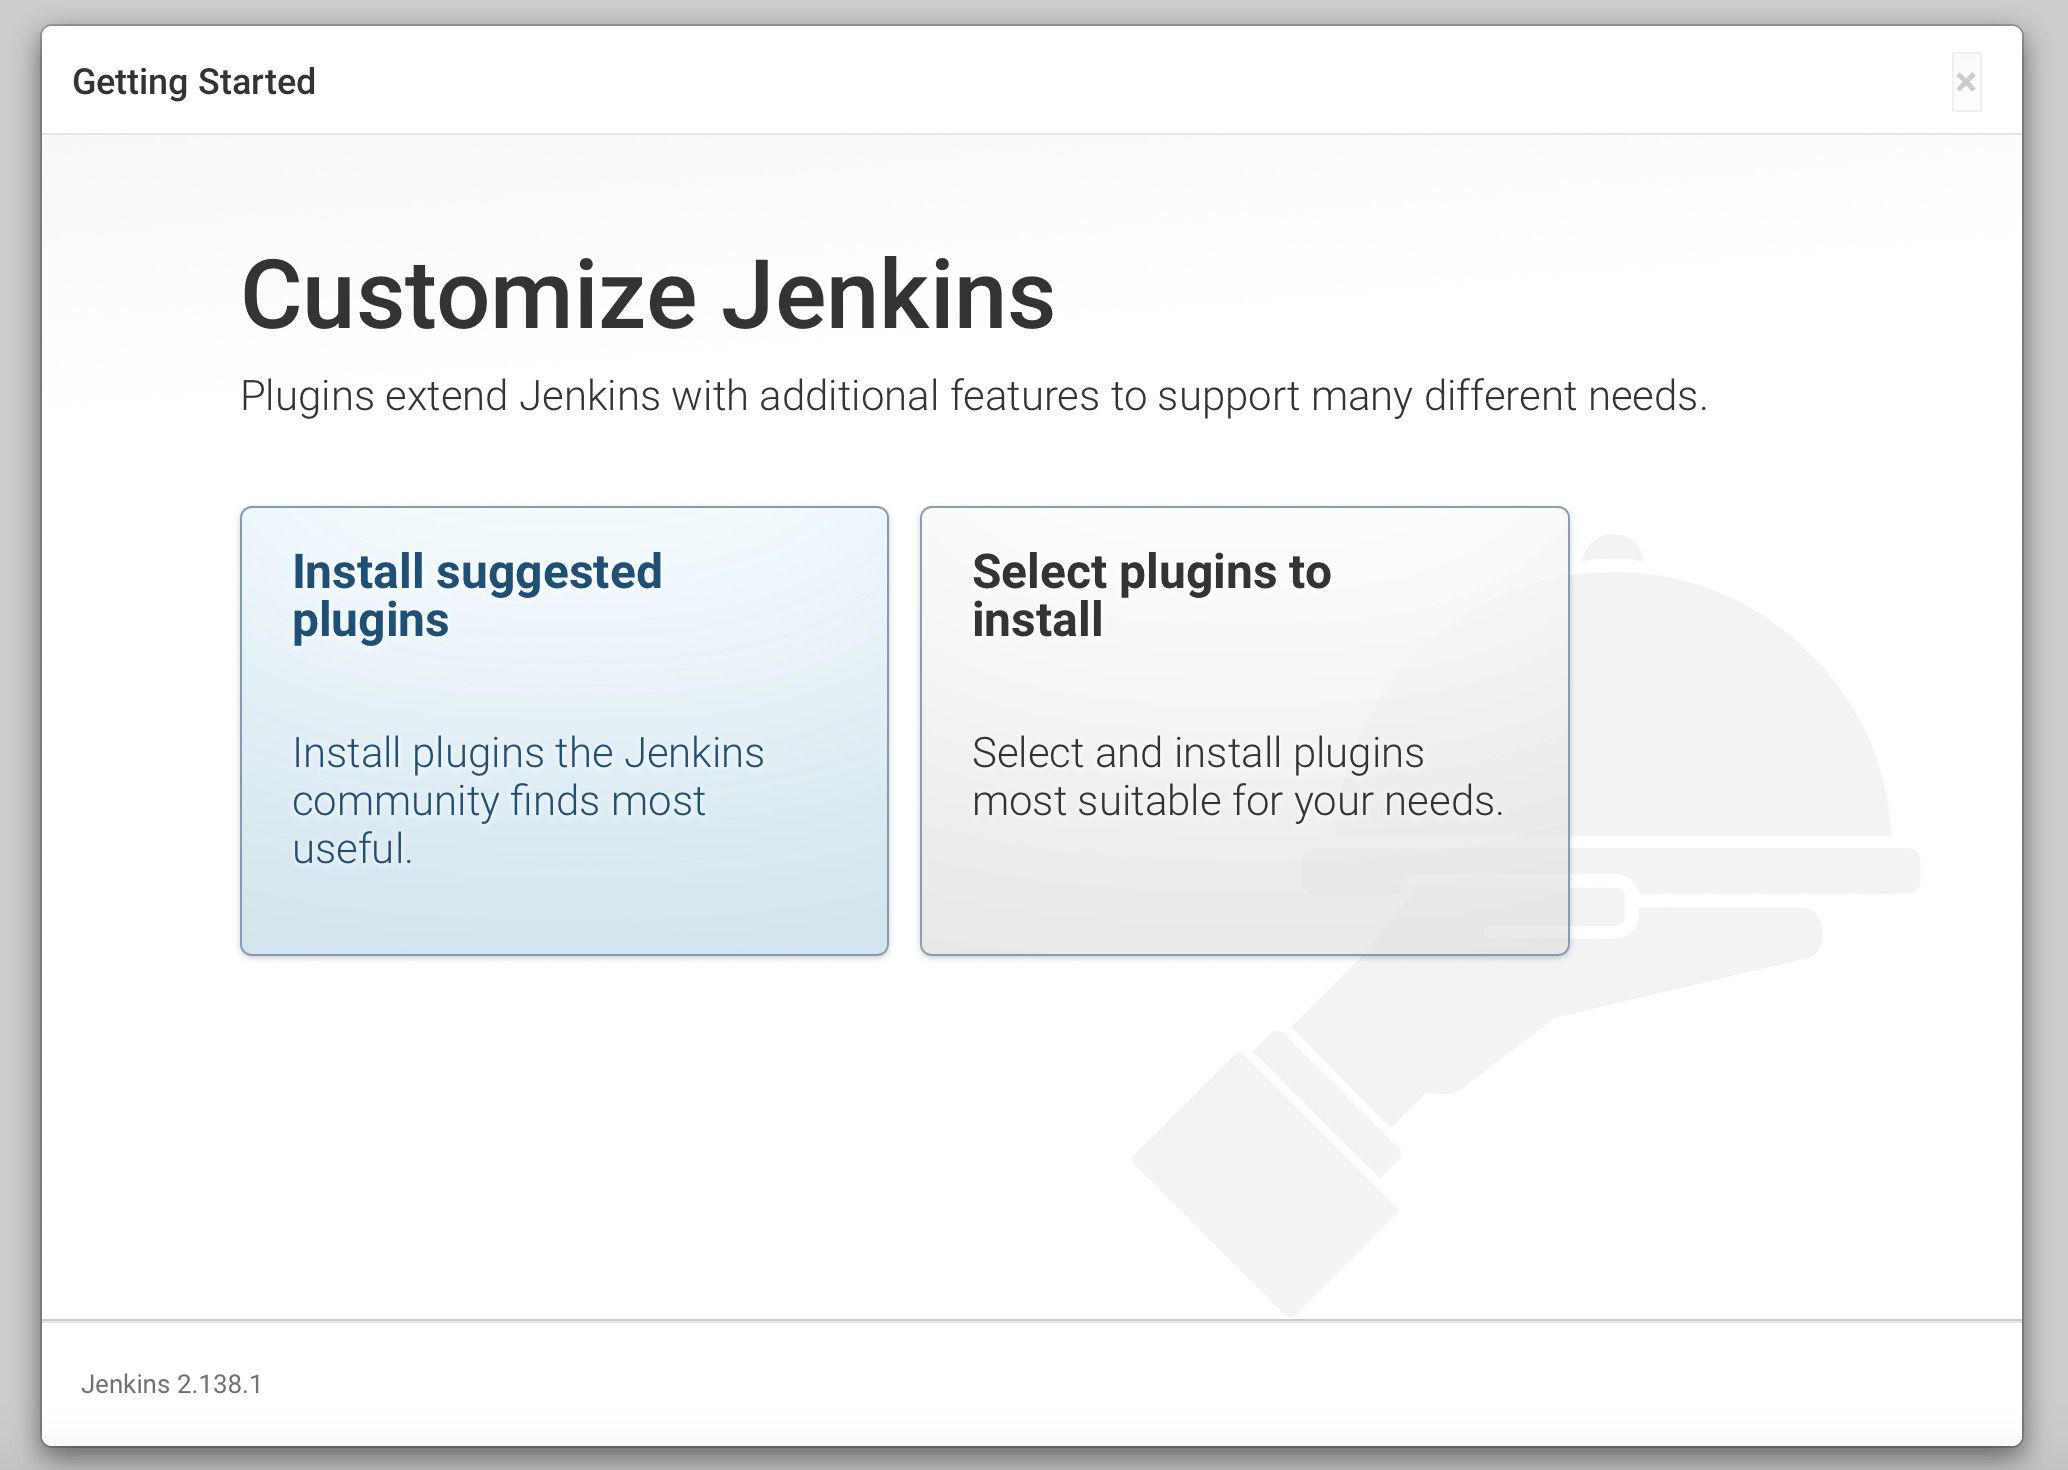
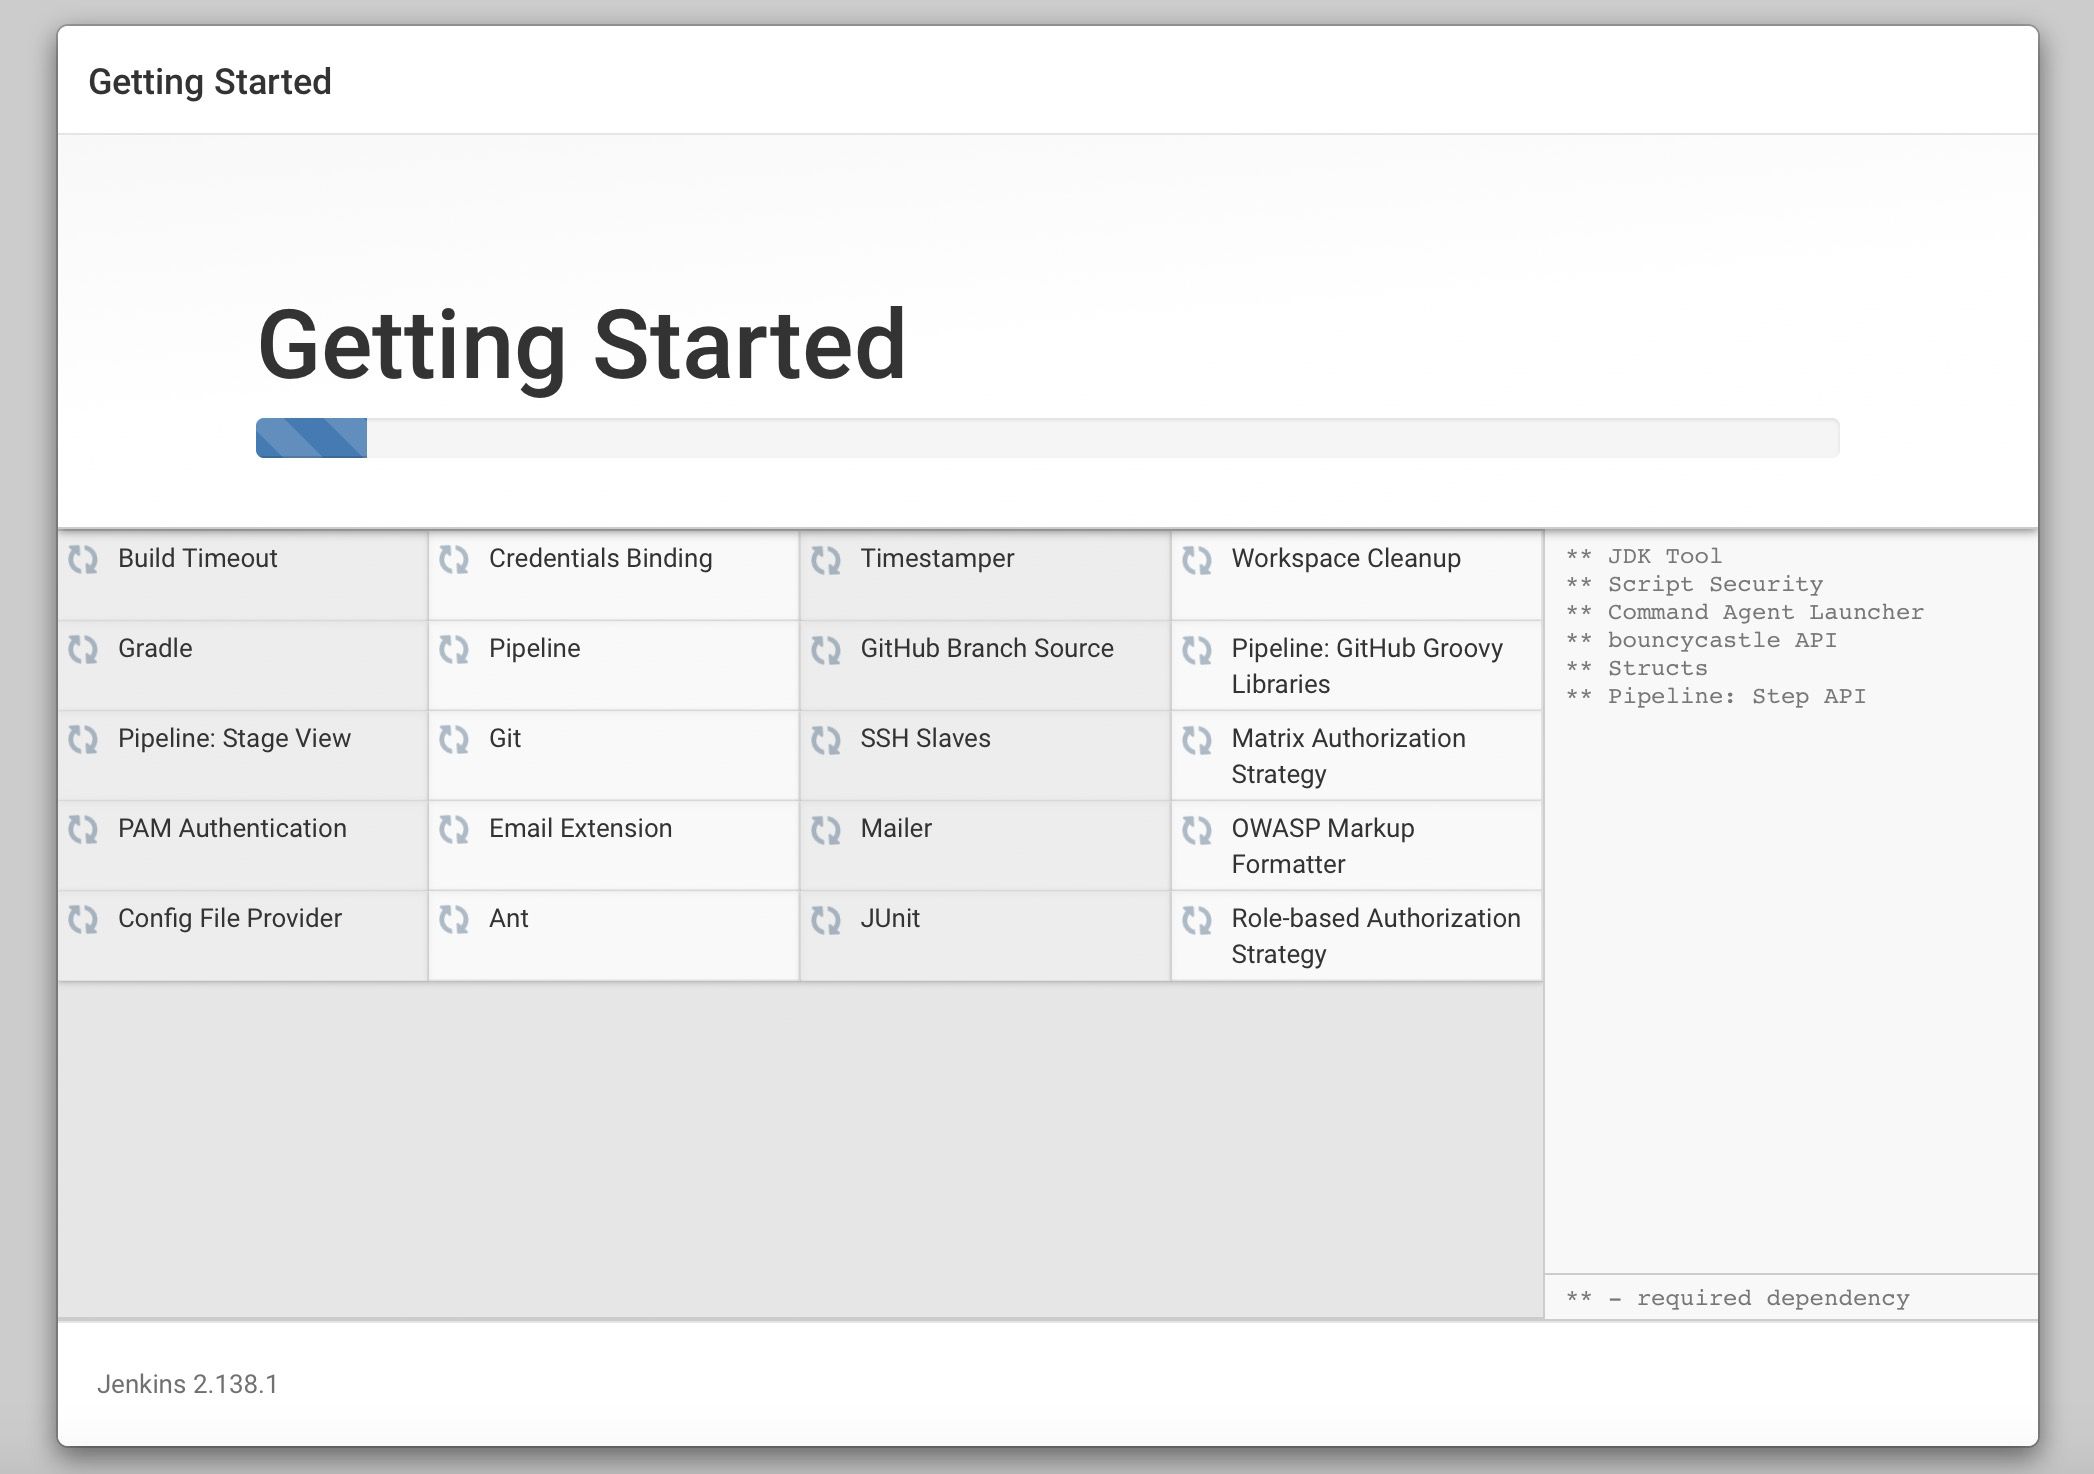
During your first setup, you might even enjoy going through this neat configurator bundled with Jenkins out-of-the-box. However, when you have to repeat the process multiple times or try to recreate your perfect configuration, the smile from your face quickly disappears when going through the above sequence AGAIN. Especially in times, when everyone is defining everything as code: infrastructure, its configuration, the application itself, how it is built, deployed, tested, etc.
Of course, people are crafty beasts, and they have created various ways to get around the problem of configuring Jenkins consistently. Groovy or Bash scripts, a bunch of plugins - all using internal Jenkins APIs that you had to be familiar with. It works but feels a bit hacky. We lacked an ‘official’ solution to the problem.
Not anymore!
JCasC is a result of cooperation between folks from Praqma and Cloudbees. It is an implementation of an already accepted Jenkins Enhancement Proposal: JEP-201.
An excellent start to get familiar with the background of the plugin is to check out the presentation from Jenkins World 2018, available here.
Enough theory, time to play :)!
To simplify things, we will run Jenkins on Docker, based on the official image from this repo.
The ‘old-school’ approach
Once again, let’s go through the usual stuff - setting Jenkins up the way we always did. We are going to prepare a Jenkins config similar to the one presented in the first post on Pipelines.
Let’s install the ‘recommended’ set of plugins with the addition of:
- Blue Ocean
- Pipeline Maven Integration
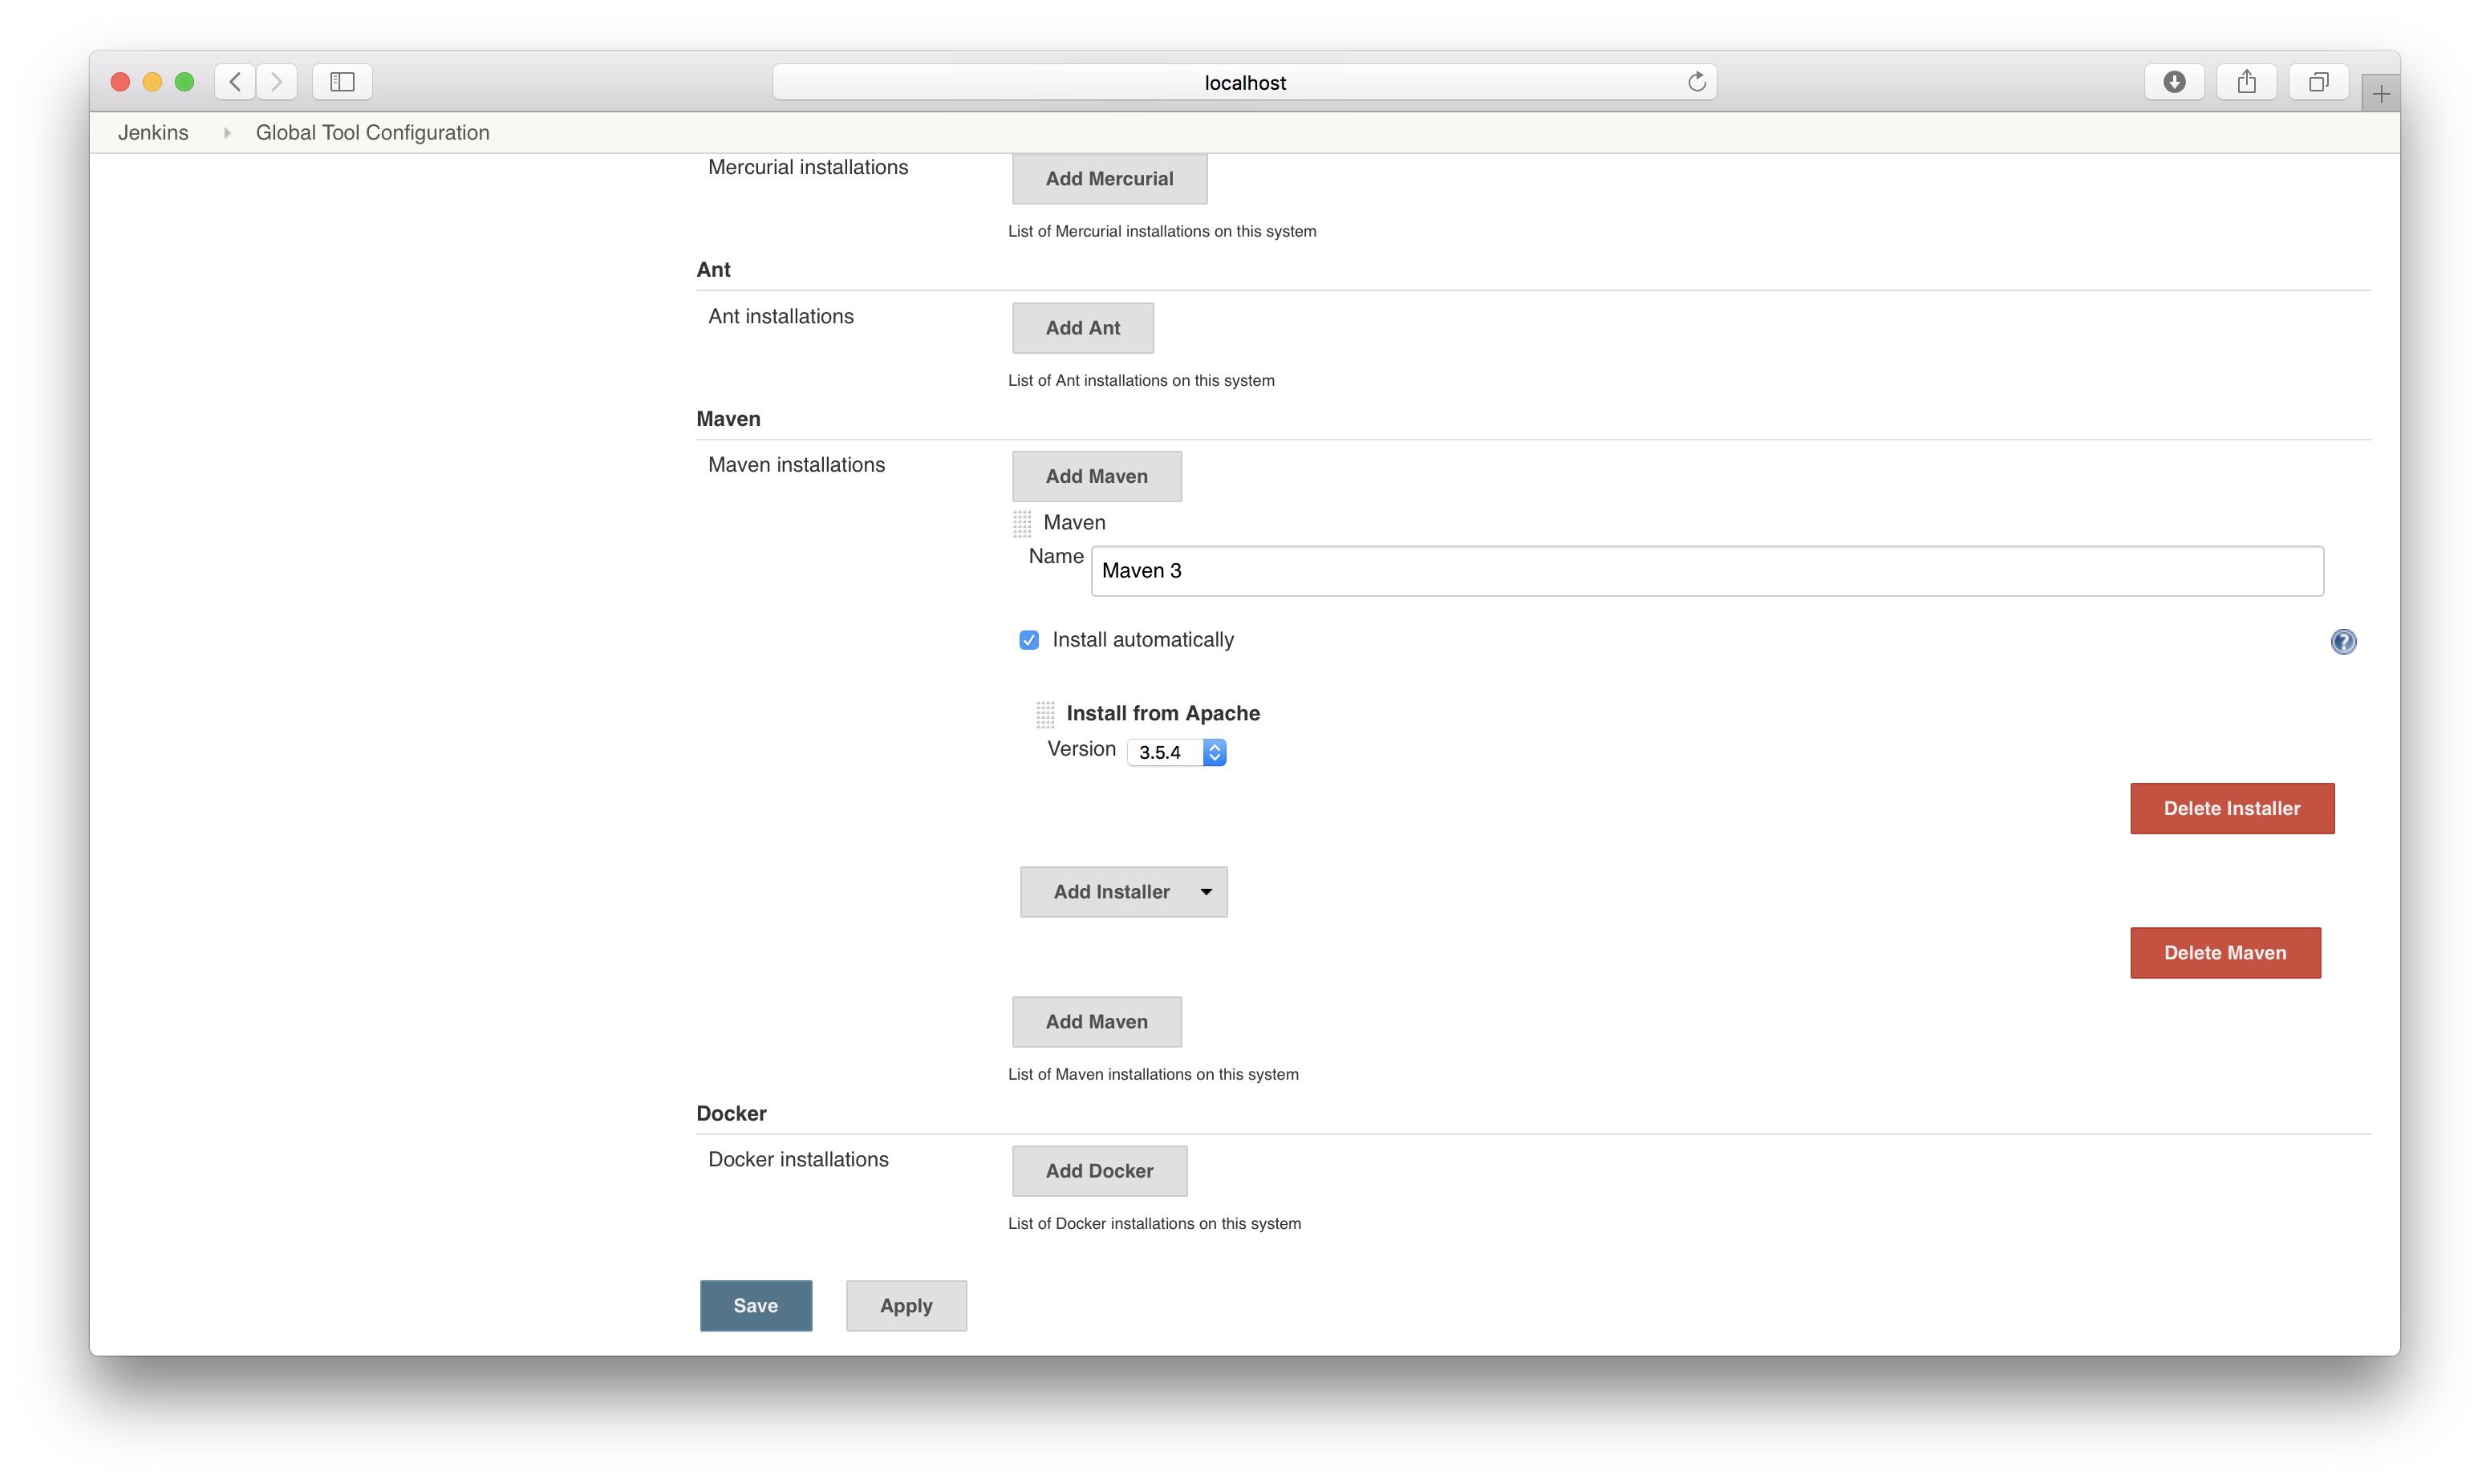
…and configure the Maven installator:
Next, it’s time to set up the job:
- Create a new Pipeline-type job
- Scroll down to the pipeline section, and provide the required info:
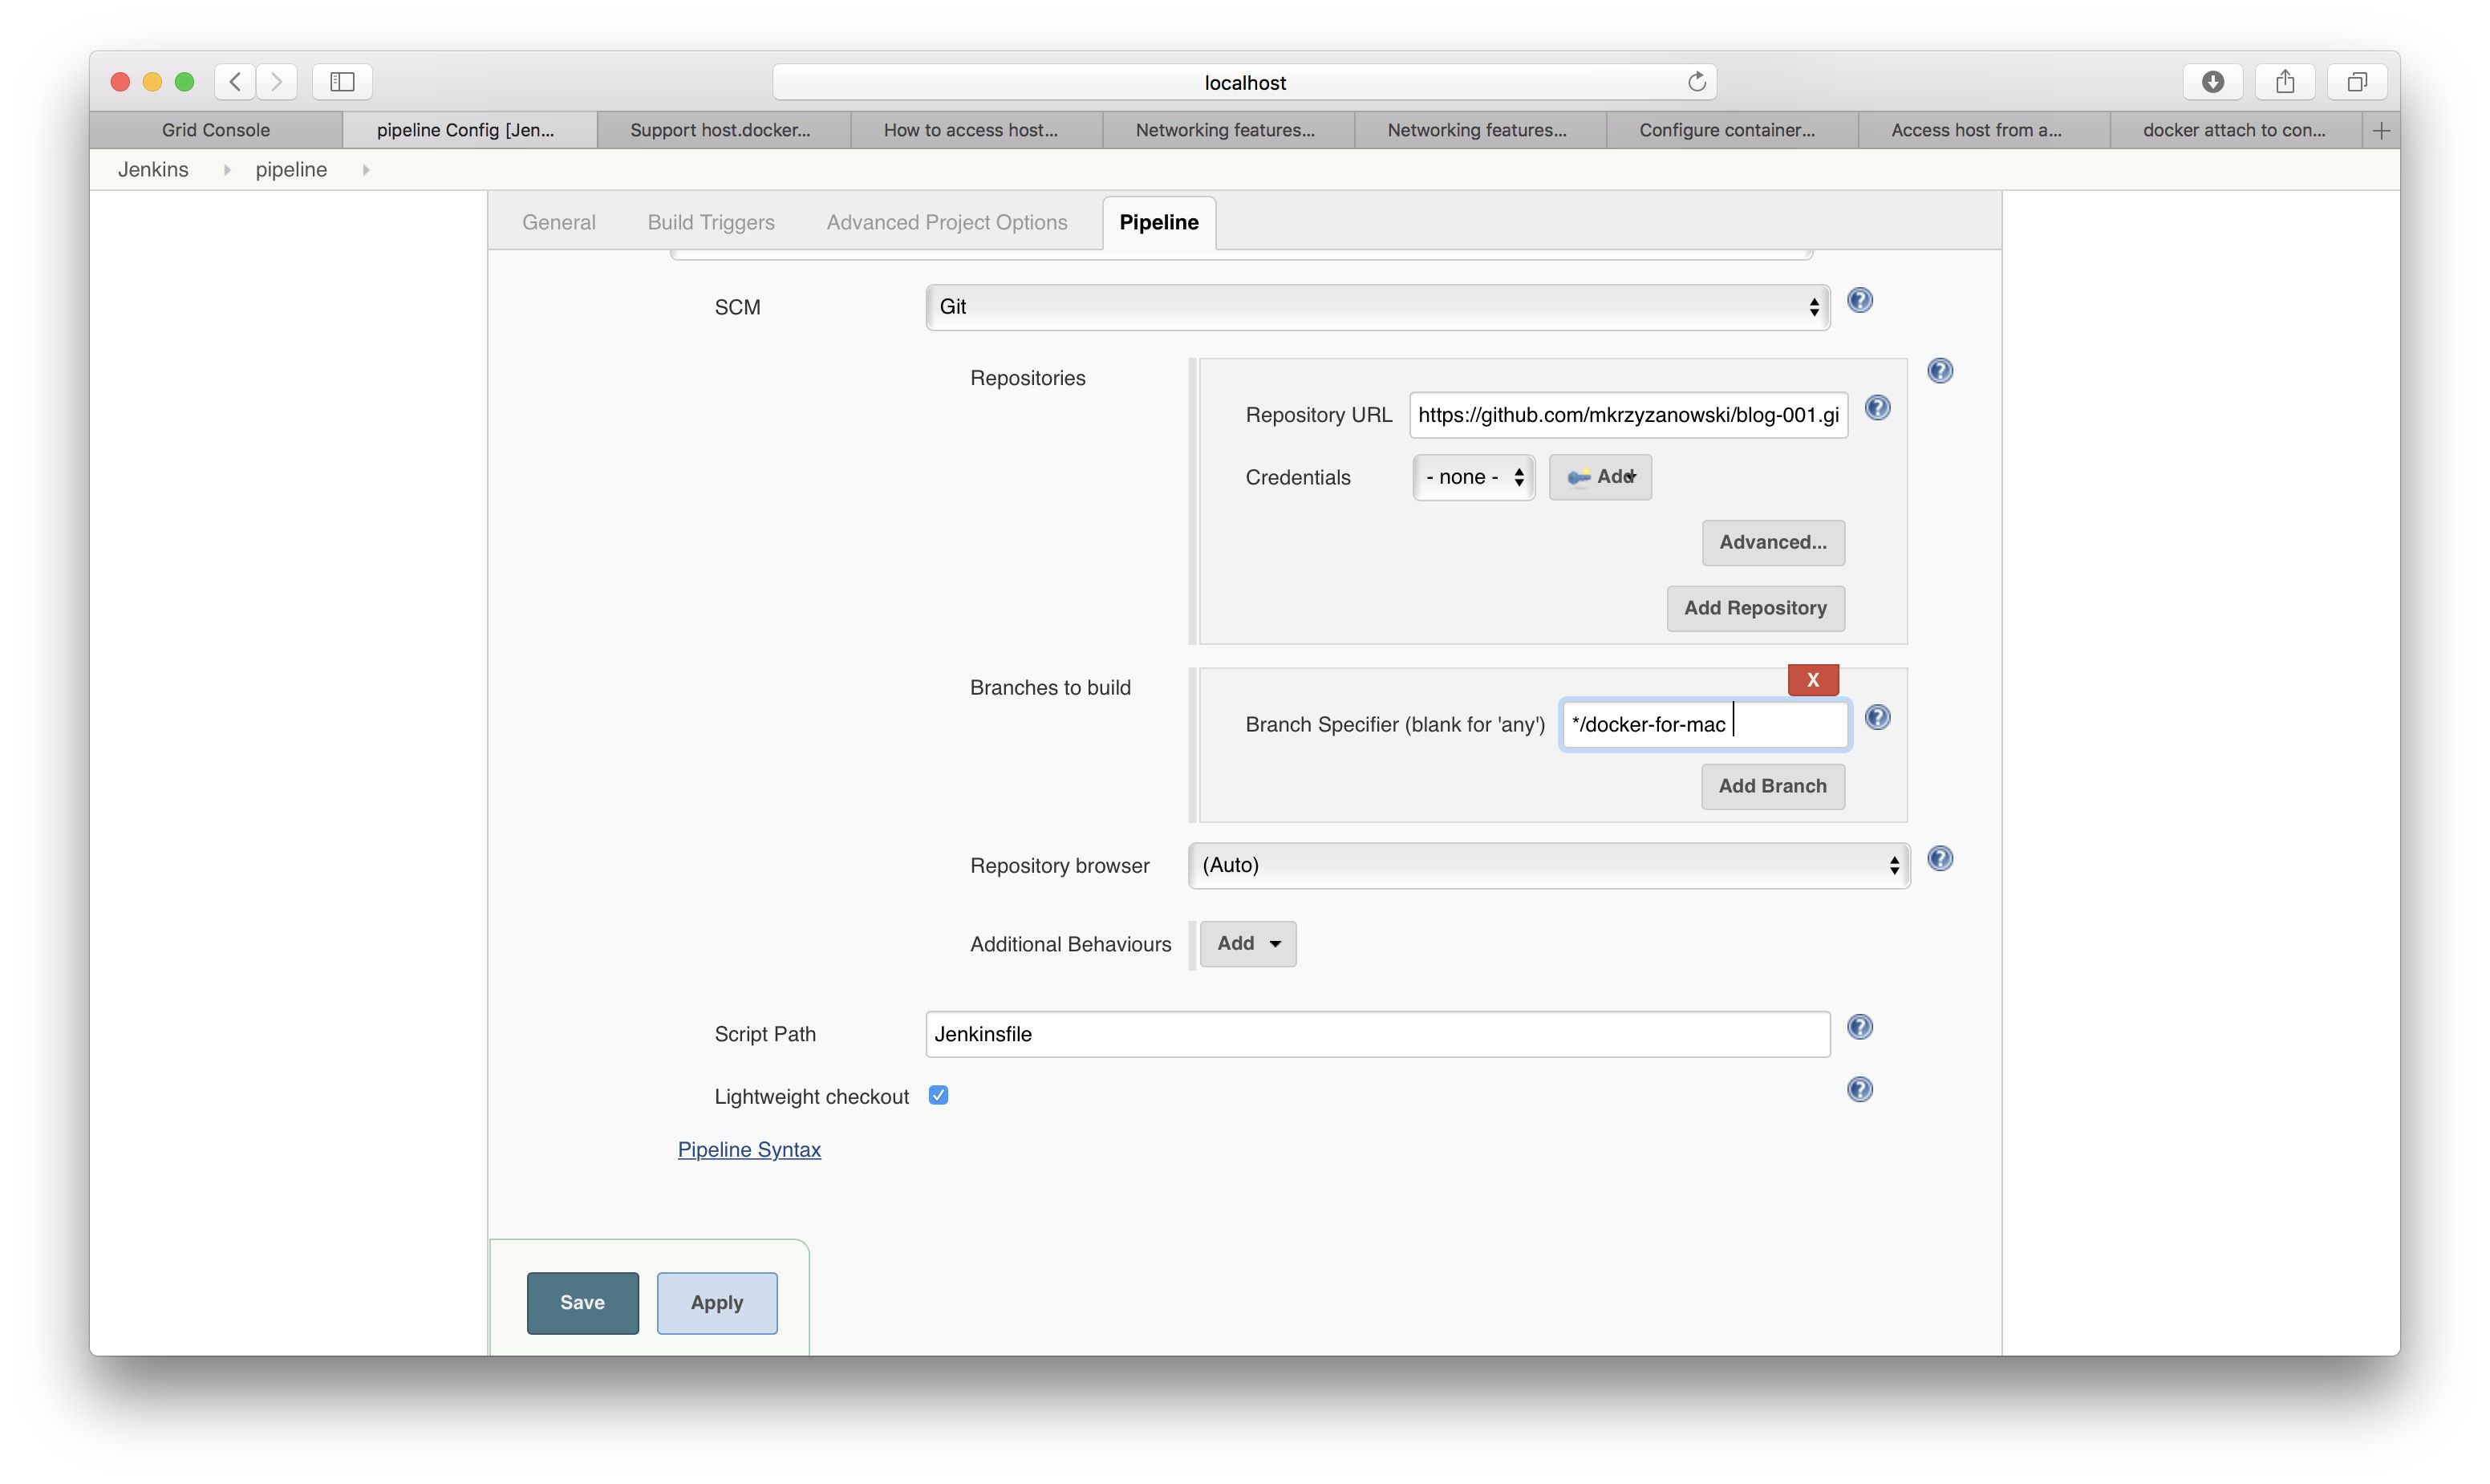
| Link to Git repo | https://github.com/mkrzyzanowski/blog-001.git |
| Branch | */master (or */docker-for-mac if you’re on macOS) |
| Script path | Jenkinsfile |
(I’ve added a new branch with macOS-friendly hostname - when writing this I’ve learned the ‘fun’ differences in Docker’s implementation across OSes…)
In the meantime, let’s quickly set Zalenium up. The TL;DR version - run the following commands:
docker pull elgalu/seleniumdocker pull dosel/zaleniumdocker run --rm -d --name zalenium -p 4444:4444 -v /var/run/docker.sock:/var/run/docker.sock --privileged dosel/zalenium start
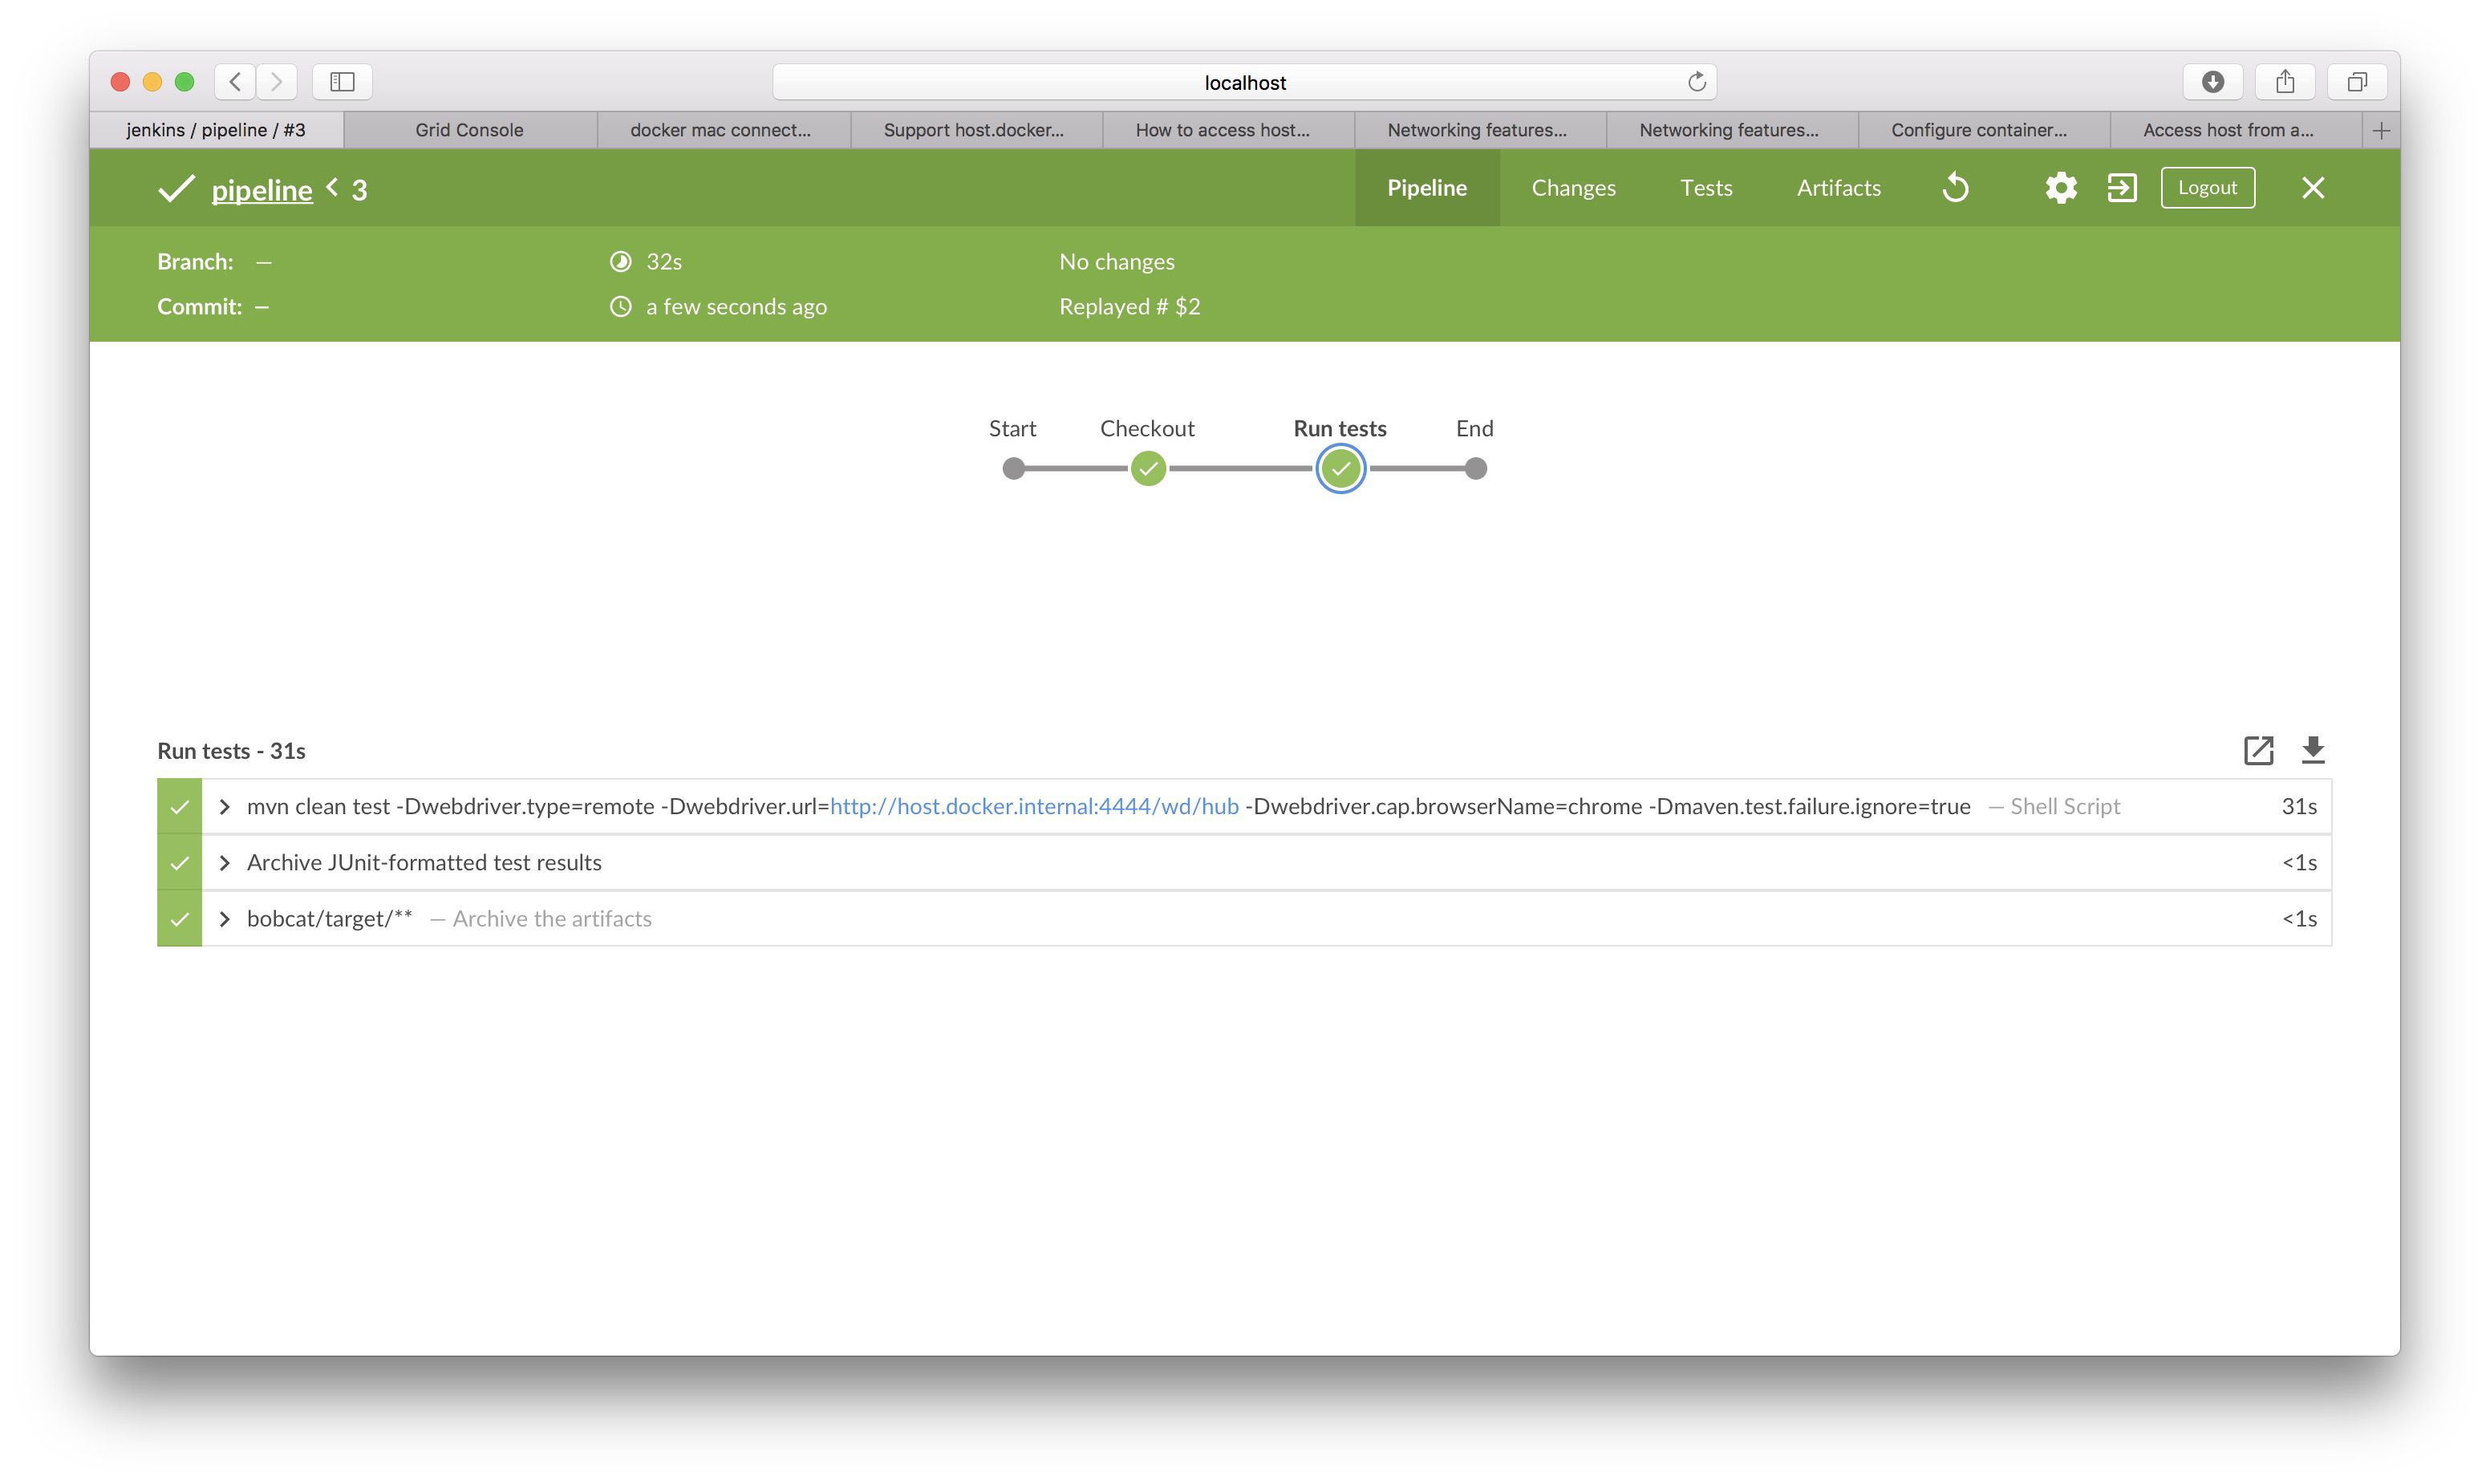
Having all that, we can, finally, run the pipeline:
The Jenkins Configuration as Code way
Round 1: first contact
All right! How are we supposed to set the JCasC up and how does it work?
One of the main principles of this plugin is to provide Jenkins user a simple, programming language-agnostic way of configuring things. The authors went with YAML format (which is my recent go-to solution for configuring things too :)) - it is human-readable and tries to mimic what you see in the Jenkins /manage page. Thus, a single jenkins.yaml confines the whole config.
How will it look in our case?
The schema is straightforward.
There are a few root elements that we can treat as categories: jenkins, tools,credentials, unclassified, plugins, etc.
jenkins:
    # you configure the general information about Jenkins, like nodes or the security-related stuff
tools:
    # here goes everything from the Global Tools Configuration page, like Git, Maven, Gradle, Docker, etc.
unclassified:
    # we configure most of the plugin-specific settings under this element
plugins:
    # over here we can define what plugins JCasC will automatically install; note: it is a Beta feature for now
Neat, right?
Ok, but what should we do with such file?
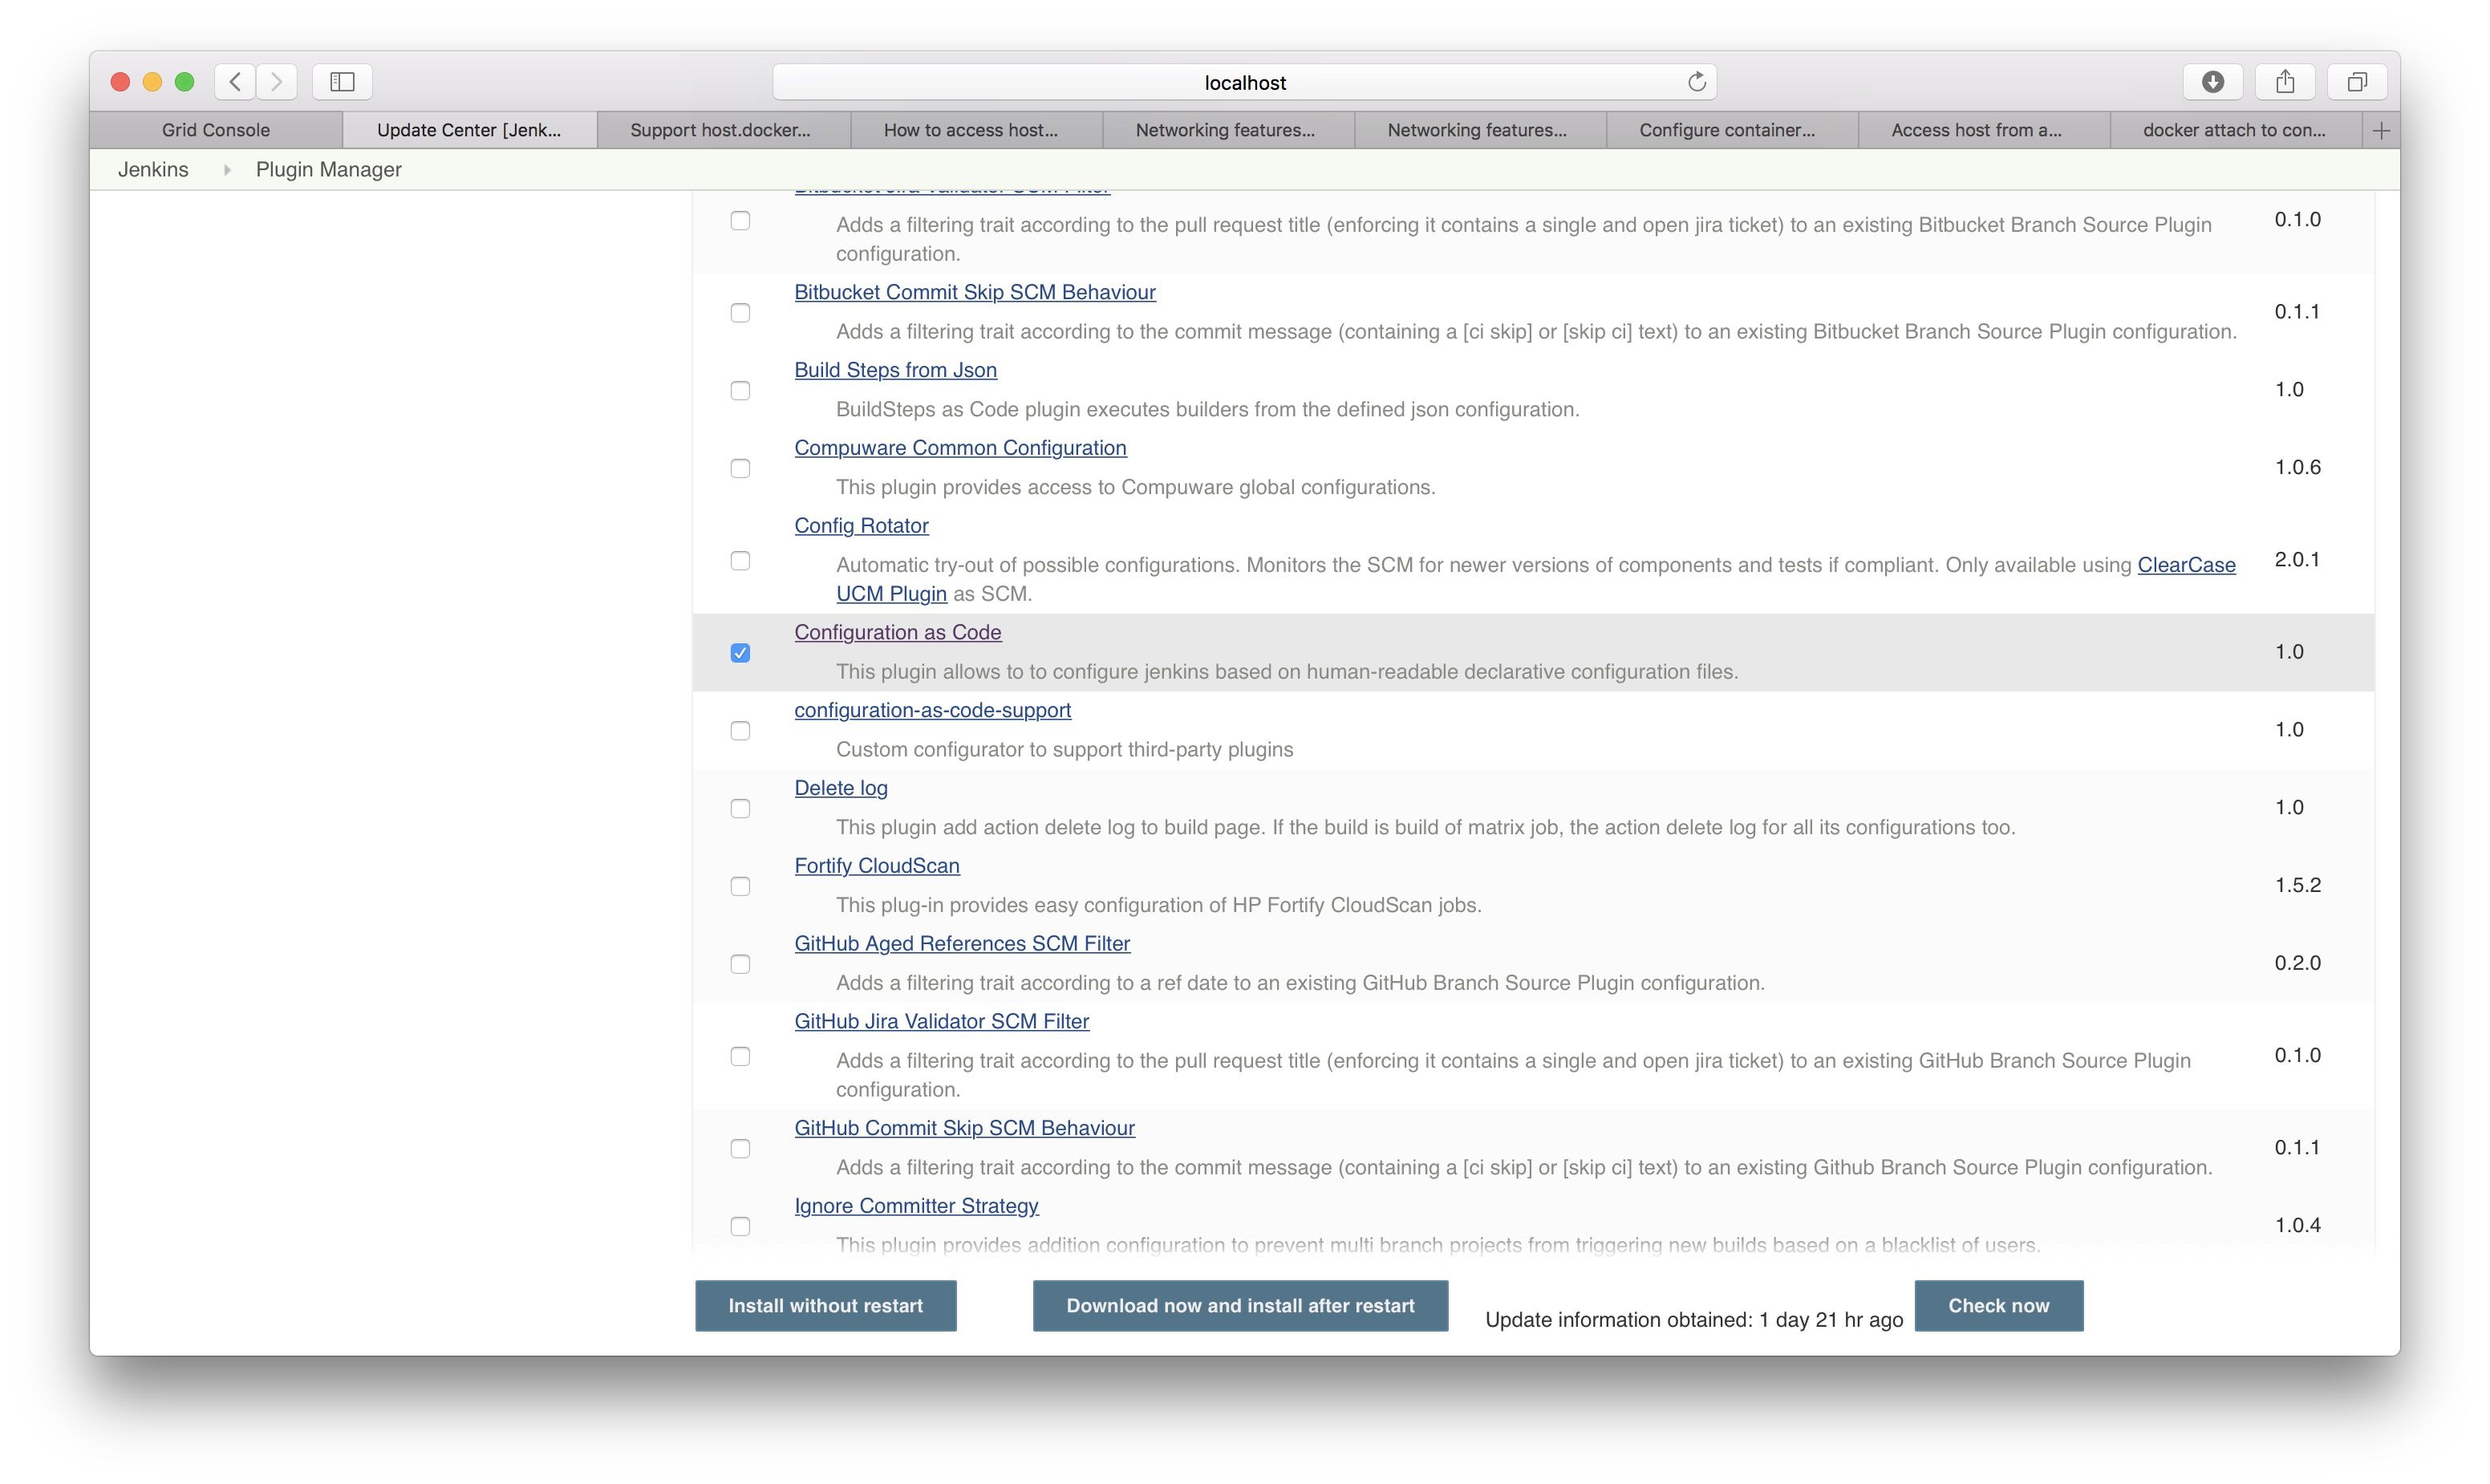
First, we need the plugin itself, of course - we can find it in the available plugins list:
After the installation, we can see a new option available in the /manage page:

Following the link gives us the JCasC configuration screen, where we can provide a path or URL to our configuration path:
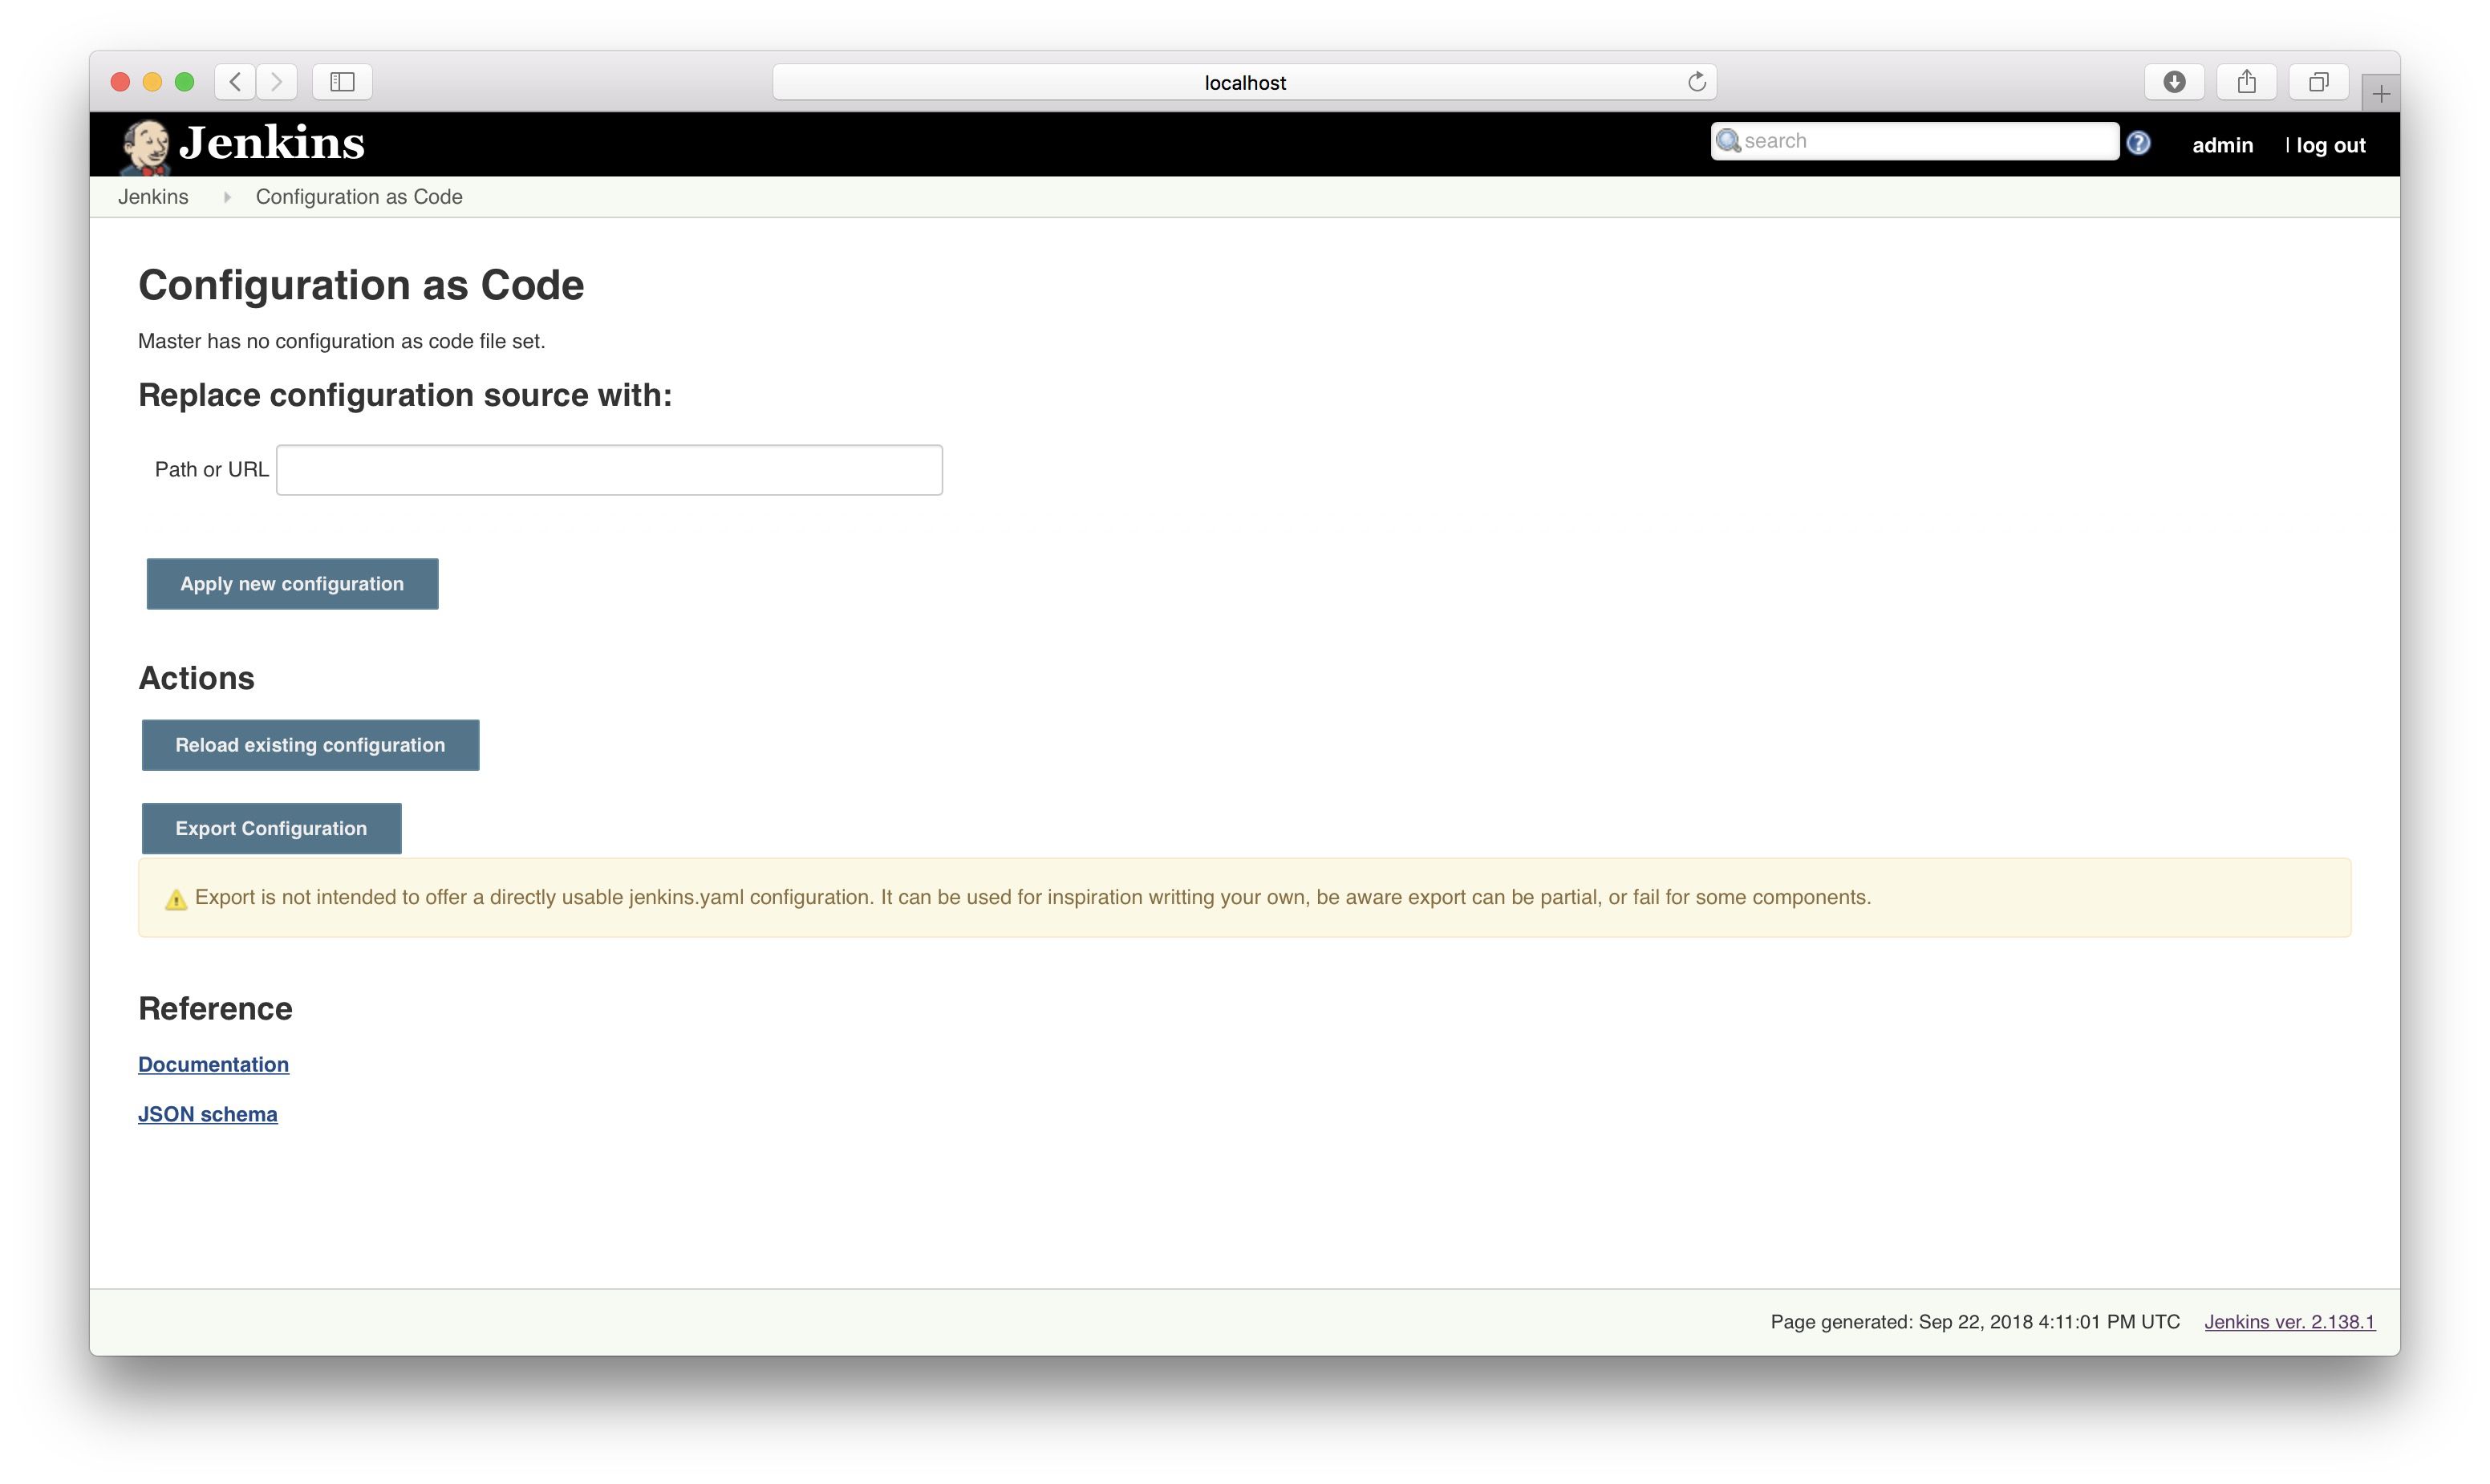
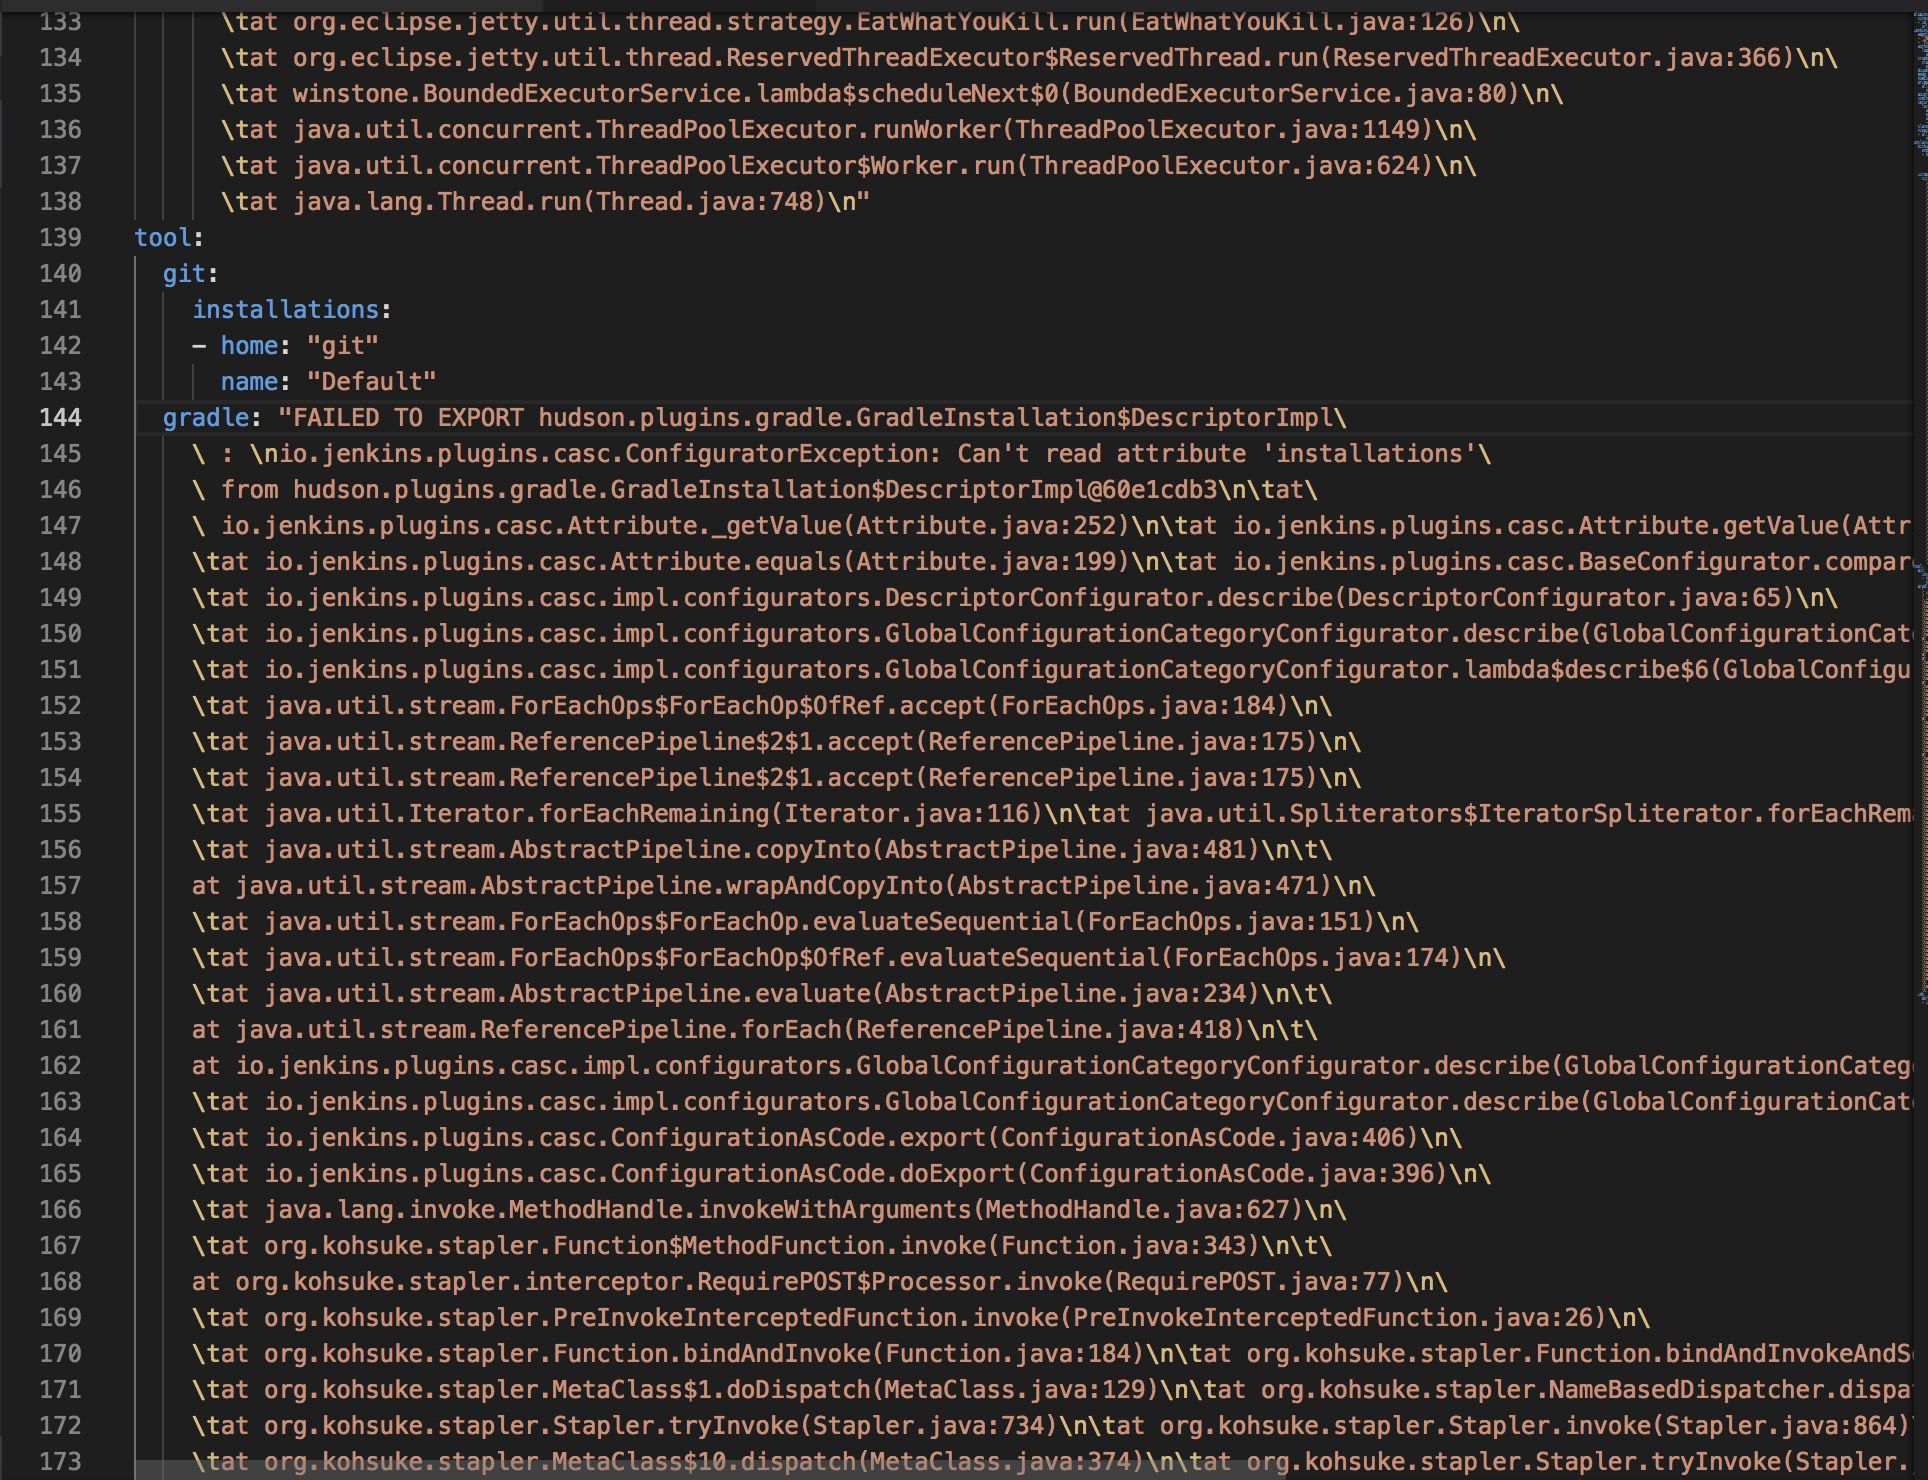
Bear in mind it is still under development, so, for example, Export is not working 100% correctly (as stated in the comment on the config page) and may result in small surprises in the exported file:
Nevertheless, it gives you the initial schema and config right away :).
Let’s tweak the configuration to match what we would like to have on our Jenkins. What are our needs anyway? Based on the initial setup that will probably be a very straightforward config file:
- Installing the Blue Ocean and Maven Pipeline Integration plugins + the useful to us from the recommended set: Pipeline
- Configuring Maven and Git tool installations
- Creating the pipeline job
Plugins
There’s a catch related to the first point. At the time of writing, the plugin installation is a beta feature, and JCasC authors recommend different ways to handle this procedure. However, since they also say:
So if you want to try it, you can.
We will :)!
Let’s translate the above to a YAML file:
plugins:
  required:
    blueocean: latest
    workflow-aggregator: latest
    pipeline-maven: latest
Let’s load it and see what happens! Unfortunately, after applying the above Jenkins entered an infinite loop of restart :(. There’s an open issue related to that: #520. I guess we will have to handle this problem differently.
Tool installations
Let’s move to the next step: configuring the tools installations:
tool:
  git:
    installations:
    - home: "git"
      name: "Default"
The git part is easy, as it is well-documented :).
The Maven is a bit more tricky. After few tries (the config is parsed right away when you try to reload it via GUI), reading through the ‘Documentation’ link from the plugin’s page (/configuration-as-code/reference), analyzing how the plugin sets the values (if you’re interested, follow the slides: link) and a bit of source code (link) I’ve got a working version:
tool:
  git:
    installations:
    - home: "git"
      name: "Default"
  maven:
    installations:
    - name: "Maven 3"
      properties:
      - installSource:
          installers:
            - maven:
                id: "3.5.4"
Unfortunately, this is not as straightforward, as basing your configuration on the labels from GUI :(.
Removing the existing settings and reloading the config ended up with the configuration re-applied, yay!
Setting up job
As stated in the docs here, the part of job setup is being delegated to another plugin: job-dsl-plugin. We also need an additional support plugin, configuration-as-code-support. Let’s install both of them quickly (and keep in mind we will need them later too!).
Now, the jobs root element will be available. Let’s add the missing part to our configuration file, using the amazing job-dsl documentation:
jobs:
  - script: >
      pipelineJob('pipeline') {
          definition {
              cpsScm {
                  scriptPath 'Jenkinsfile'
                  scm {
                    git {
                        remote { url 'https://github.com/mkrzyzanowski/blog-001.git' }
                        branch '*/docker-for-mac'
                        extensions {}
                    }
                  }
              }
          }
      }
Removing the job, reloading the JCasC configuration and the job is there, passing green again :)!
Time to move to the next stage.
Round 2: configuring a Jenkins instance from scratch using JCasC
After playing a bit with an existing instance, it is high time to take the next step - configuring a fresh Jenkins installation with the Jenkins Configuration as Code plugin!
Now, here’s a small roadblock we run into - the chicken-and-egg problem. To use the above configuration, first we have to make sure that the JCasC plugin is available on our Jenkins instance, but since we obviously cannot provision it by the same configuration file and since it is not shipped officially with Jenkins (yet…?), we have to find a workaround!
Fortunately for us, the Jenkins Docker image comes with a handy script on board, install-plugins.sh. We will use it to pre-install the JCasC plugin. It’s also the recommended way of handling other plugin installation as well (due to the beta state of plugins part of the config), so we will kill two birds with one stone here. More info about plugin pre-installation can be found in the official image docs.
We will also need means to provide a way to point to the YAML config initially. Fortunately, JCasC uses an environmental variable for this purpose: CASC_JENKINS_CONFIG. As I’ve mentioned before when setting this in GUI, we can either keep the config remotely and provide an URL or keep it as a local file and provide a path to it. We will go with the second option.
Summing it up, we need to do the following:
- Create a list of all required plugins in a file (so it will be easier to manage it)
- Create the config YAML
- Copy both files to the container
- Set the
CASC_JENKINS_CONFIGto point to the config file - Start the Jenkins and hope everything works
Plugins file
As stated in docs, we can provide a simple text file with each plugin in a new line. Here’s our plugins.txt:
workflow-aggregator:latest
blueocean:latest
pipeline-maven:latest
configuration-as-code-support:latest
job-dsl:latest
In a real setup, it would be wise to provide specific versions, so you can control what you install on your instance :).
JCasC config file
We will use the configuration from the previous round. Below is our final YAML, with an additional message that Jenkins will display :):
jenkins:
  systemMessage: "AutomatingGuy demo: configured automatically with JCasC plugin\n\n"
tool:
  git:
    installations:
    - home: "git"
      name: "Default"
  maven:
    installations:
    - name: "Maven 3"
      properties:
      - installSource:
          installers:
            - maven:
                id: "3.5.4"
jobs:
  - script: >
      pipelineJob('pipeline') {
          definition {
              cpsScm {
                  scriptPath 'Jenkinsfile'
                  scm {
                    git {
                        remote { url 'https://github.com/mkrzyzanowski/blog-001.git' }
                        branch '*/docker-for-mac'
                        extensions {}
                    }
                  }
              }
          }
      }
Preparing Jenkins container
Next, it’s time to load these two files onto the container. For that reason, we will create a Dockerfile:
FROM jenkins/jenkins:lts
COPY plugins.txt /usr/share/jenkins/ref/plugins.txt
COPY jenkins.yaml /usr/share/jenkins/ref/jenkins.yaml
RUN /usr/local/bin/install-plugins.sh < /usr/share/jenkins/ref/plugins.txt
With the above, we can build our new image:
docker build -t automatingguy/jcasc-demo .
Now, let’s run:
docker run --name jcasc-demo -d -p 8081:8080 -v jenkins_home-jcasc:/var/jenkins_home automatingguy/jcasc-demo
After a while, when navigating to the http://localhost:8081 we can see the following:
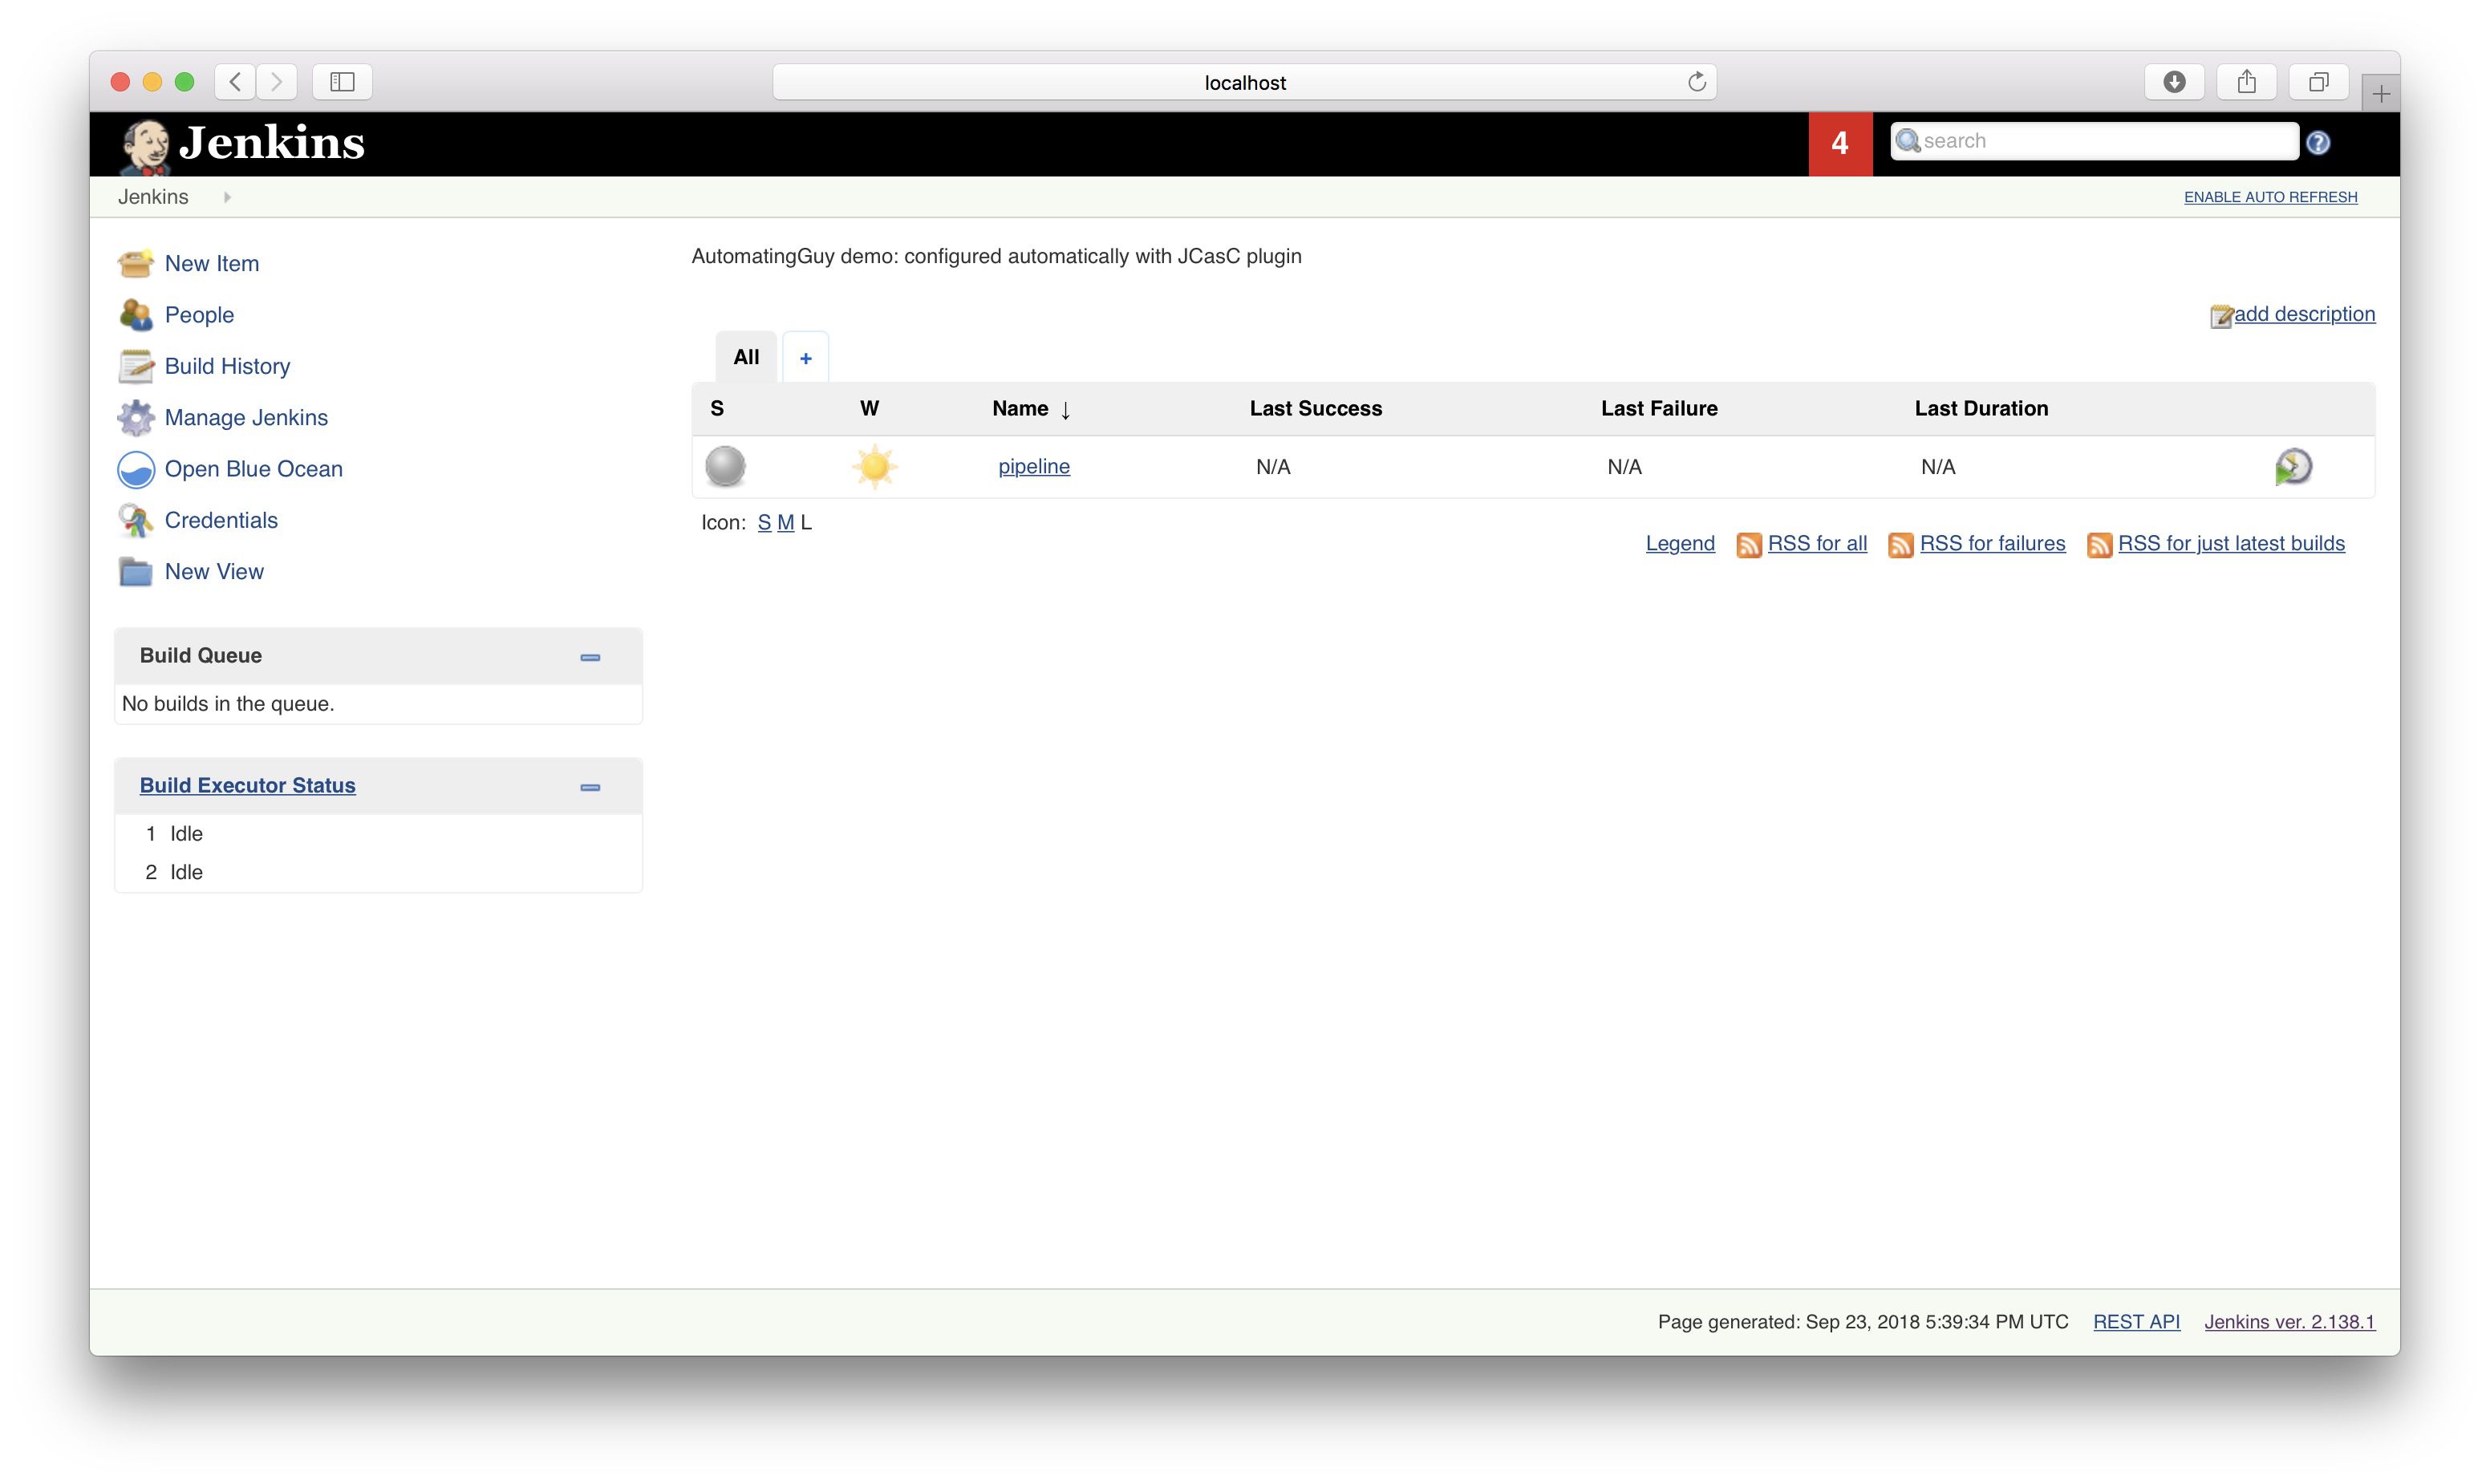
Success! I’m a bit shocked, as this one worked after the very first time :D.
Also, apparently (as seen here) the plugin automatically loads the config from under the Jenkins root, which in our case is /var/jenkins_home/ folder. Hence, the environmental variable is not needed after all!
There are at least a couple of issues related to our setup, like security not being enabled at all :). Nevertheless, we have a good starting point for further experiments!
Bonus: tying it all together
Having a Jenkins configuration defined as code, we can now spawn it as many times as possible, on different machines with the same result, with little to no tiresome manual walk through the GUI. We also have the job, our pipeline, defined as a code. The required infrastructure that handles the tests, Zalenium in our case, can also be set up with few commands.
Wouldn’t it be awesome if we could run this whole stack with a single command :)?
Thanks to the fact we’ve stuck to Docker ecosystem so far, we can do that easily!
Let’s prepare a Docker Compose file that will do precisely that!
version: '3.7'
services:
  jenkins:
    build:
      context: ./jenkins
    ports:
      - 8080:8080
    volumes:
      - jenkins_home:/var/jenkins_home
      - ./jenkins.yaml:/var/jenkins_home/jenkins.yaml
  zalenium:
    image: dosel/zalenium:latest
    ports:
      - 4444:4444
    volumes:
      - /var/run/docker.sock:/var/run/docker.sock
    command: start
volumes:
  jenkins_home:
Now, after running:
docker-compose up
we have a fully working local stack for running Selenium tests with Jenkins on Zalenium grid :)!
Summary
After this small exercise with the ‘Jenkins Configuration as Code’ plugin, there are things that I’m positively surprised about: how smoothly it works right out-of-the-box with a previously prepared configuration and how flexible the configuration is. As I suspected, it may not be that trivial to figure out some specific configurations. It’s not the fault of the JCasC itself - the whole ecosystem around Jenkins is complex and not strictly standardized: implementation of plugins differ, it might be tough to have a seamless, unified layer on top of everything that will hide these differences. At least not right away :).
Give JCasC a try! Let me know what you achieved or did not with it :).
As always, all the above code is available on GitHub: link
PS. A blog post about JCasC on Cloudbees site: link